Good morning everyone,
It's triangles week here on the blog.
Neil has been very busy and has a beautiful project for
you today.....this is absolutely amazing!
Neil says "Well I was playing around with no particular plan in mind
and ended up making this. A multiway opening triangle book.
To start, cut some 12 x 12 white card sheets in half diagonally.
(You can use any square size though.)
Fold each piece in half.
Fold as seen.
Fold the next piece the same and slide in place onto the first.
Glue the two pieces together.
Repeat until all pieces are used and set to one side and leave to dry
(Preferably pressed down to keep flat.
Cut two pieces of card slightly larger than the pages for the covers
out of thick card.
Cut two smaller pieces and other decorative elements for the covers.
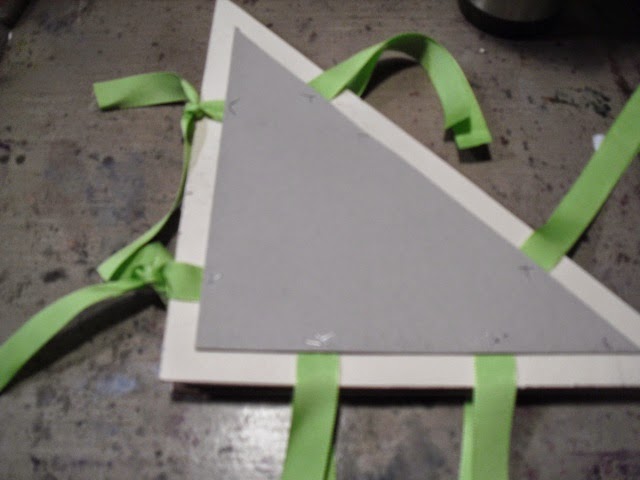
Cut 12 pieces of ribbon long enough to be tied and staple them to
the smaller triangles.
Add strips of double sided tape and glue.
Adhere to the covers.
Adhere the pages to the covers using tape and glue on the first
and last page. Leave to dry. So, this is one way to open the book.
Or you can flip it round and open it this way.
Or this way
Or this way too.
As you can see, there are a number of different ways to open it,
and I've not shown them all to you! It was fun to
make though.
I've coloured the whole thing with Dylusions inks and left to dry.
I've then added stamped details to the covers and wrapped the
edges with decorative tape too before edging with some
Treasure Gold.
I have punched holes in all 3 corners with a crop o dile. How you tie
the ribbons determines which edge of the book stays closed
and the book rings can be used as well to hold the covers together.
If you do not tie any ribbons or use rings you can open the whole book
out This one stretches to about 1,2m LOL".
Wow Wow Wow!!!!
Who is going to have a go then......
This what Neil used -
Doodlebug Textured Cardstock - Lily White
Kaisercraft Texture Clear Stamp - Script
Kaisercraft Texture Stamp - Butterfly
Ribbon
Archival Ink - Jet Black
Stix 2 Ultra Sticky Clear Tape
Dylusions Ink Spray
Book Rings - 50mm
DecoArt Faux Finishing Medium
Treasure Gold - Classic
We'd love to know what you think of Neil's Book!
Don't forget to get your entries in for February's Calendar Challenge.
(The link will put your pic on but just keeps it in the link.
Unfortunately it just didn't seem to be working properly).
March starts on Sunday, wonder what your next two words will be?
Any guesses???
See you tomorrow,
Jane x
Neil has been very busy and has a beautiful project for
you today.....this is absolutely amazing!
Neil says "Well I was playing around with no particular plan in mind
and ended up making this. A multiway opening triangle book.
To start, cut some 12 x 12 white card sheets in half diagonally.
(You can use any square size though.)
Fold each piece in half.
Fold as seen.
Fold the next piece the same and slide in place onto the first.
Glue the two pieces together.
Repeat until all pieces are used and set to one side and leave to dry
(Preferably pressed down to keep flat.
Cut two pieces of card slightly larger than the pages for the covers
out of thick card.
Cut two smaller pieces and other decorative elements for the covers.
Cut 12 pieces of ribbon long enough to be tied and staple them to
the smaller triangles.
Add strips of double sided tape and glue.
Adhere to the covers.
Adhere the pages to the covers using tape and glue on the first
and last page. Leave to dry. So, this is one way to open the book.
Or you can flip it round and open it this way.
Or this way
Or this way too.
As you can see, there are a number of different ways to open it,
and I've not shown them all to you! It was fun to
make though.
I've coloured the whole thing with Dylusions inks and left to dry.
edges with decorative tape too before edging with some
Treasure Gold.
I have punched holes in all 3 corners with a crop o dile. How you tie
the ribbons determines which edge of the book stays closed
and the book rings can be used as well to hold the covers together.
If you do not tie any ribbons or use rings you can open the whole book
out This one stretches to about 1,2m LOL".
Wow Wow Wow!!!!
Who is going to have a go then......
This what Neil used -
Doodlebug Textured Cardstock - Lily White
Kaisercraft Texture Clear Stamp - Script
Kaisercraft Texture Stamp - Butterfly
Ribbon
Archival Ink - Jet Black
Stix 2 Ultra Sticky Clear Tape
Dylusions Ink Spray
Book Rings - 50mm
DecoArt Faux Finishing Medium
Treasure Gold - Classic
We'd love to know what you think of Neil's Book!
Don't forget to get your entries in for February's Calendar Challenge.
(The link will put your pic on but just keeps it in the link.
Unfortunately it just didn't seem to be working properly).
March starts on Sunday, wonder what your next two words will be?
Any guesses???
See you tomorrow,
Jane x


This book is amazing.
ReplyDeleteand my guess for the new words will be something with spring, fresh green colour?
ReplyDeleteInteresting butterfliecrafter........you are on the right lines.....but you'll have to wait and see!! Haha!!
ReplyDeleteJane x
Ingenious book! The multi openings are interesting and the book ring closure too. The cover is beautiful as well.
ReplyDeleteFor the new words I'm thinking yellow and egg!
Craftyfield......you are getting warmer.......
ReplyDeleteJane x