
Happy Weekend everyone,
Gosh where are the weeks going??
Enjoy your Bank holiday weekend,
hope you are doing something special!
Don't forget to get your August Calendar
picture to the link by midnight Monday,
September is with us on Tuesday.
Goodness that means the school holidays
are nearly over!
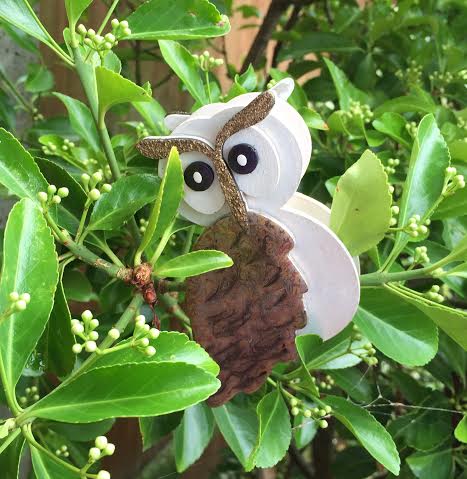
Well, today is our last post for Animal Magic,
Rachel is here with us to show you
her project!

Paint the two large bodies of the owl on
both sides using Chalk Paint.


The body part with the ears, paint with Nougat
on both sides.


Cover one side of each of the nose sections
with Versamark Ink and coat with the
Mahogany Glitter Embossing Powder.
Use heat gun to set and repeat process if
necessary to get even coverage.

Using Versamark Ink, coverthe eyes and coat
with Aurora Viola Black Embossing Powder.
Heat set.
The colour will look black but when it catches the
light it will give a violet shine.
When cool, colour around the edges of the
eyes with black ink to cover the edges.
Using a cocktail stick and a tiny amount of
Chalk Paint add the whites to both eyes.
Paint the wooden peg with Nougat Paint and
set aside to dry.

Take the parts of the owl that will form the face
and wings, using Versamark Ink and Seasonings
Embossing Enamel, cover both wings twice to ensure
a smooth coverage.
Repeat a third time but while you are melting
the powder and it is still movable,
take a cocktail stick and feather
slightly through the enamel, you will find this
brings some of the darker colour out, thus
giving the illusion of feathers!

Leave to cool.
Add a thin coat of Gold Interference Paint
to the larger back section of the owl and to the
top section on the face. This will highlight
the bird. Using your finger add a little of the
paint onto the nose section. This will add
dimensional shine to the Mahogany Embossing
Glitter.
Attach the features of the owl with Pinflair
glue or other strong adhesive. Leave to set.
Line the peg up between the large sections of the
owls and glue. Allow the glue to dry.

Add the two top parts of the bird,
lining up as required and allow to set.
You now have an owl peg!!
Instead of a peg you could cut the owl shape
from magnetic sheet to make 2 magnets.
Wow, thank you Rachel, how nice is that??
If you want to have a go, this is what
you'll need -
Embossing Powders -
Wooden Clothes Peg
Cocktail Sticks
Paint Brushes
Cocktail Sticks
Paint Brushes
So that is it for another week,
I shall be back tomorrow with our
new Weekly Challenge.
What do you think it is going to be??
Jane x
Fabulous project :)
ReplyDeleteGreat project, I want one of those!
ReplyDelete