Saturday, 11 February 2017

Starlight Express


Starlight Express


Morning All!

Another lovely day and
here is another lovely project
for you to try. 

Get your cuppa and sit back
and relax............

Hazel Harler has brought 
this gorgeous box and here
she is to talk us through
how she achieved all that
gorgeousness ...


"For my latest project I've decorated a wooden box
 with Imagination Crafts Starlights paints


 I painted the box with white gold Starlights, 
it gave the box a lovely shimmery layer 
with the woodgrain showing through


 I added some tissue tape to the top and sides 
and stamped some foiliage with green Archival ink, 
I also stamped some script with black Archival.


I then painted some copy paper with pink sunset Starlights paint


 When the paint was dry I stamped some flowers and cut them out


The flowers were glued to the sides of the box. 
When the glue was dry I used a craft knife 
to carefully cut between 
the lid of the box and the base


 I decided to keep the decoration on the top of the box simple, 
I was going to use stampbourd but then 
found an acrylic ATC in my stash and used that


I stamped and painted the flowers on the backside of the ATC


 I glued the ATC to the top of the box and 
added some gold gems to the corners"


Supplies used:

Wooden box
Imagination Crafts Starlight paints - white gold, pink sunset and passion flower.
Tissue tape
Archival ink - black and green
PaperArtsy/Kay Carley stamp set
Copy paper
Acrylic ATC, you could use acetate if you haven't got an ATC
Gold sticky backed gems


Thank you Hazel, this box
really is beautiful - the shimmery
effect of Starlight Paints is superb
and using the gems as rivets a masterstroke

If you haven't tried these paints, then
you really should put these on your 'To Buy' list
you won't be disappointed in the shimmery loveliness

'Till tomorrow

Mickie xx


Friday, 10 February 2017

Starlight Express

Starlight Express


Hallo Everyone!
Nice to see you

We have a super project
for you today from

Louise Thomson

Sit back and enjoy as
she shows us what to
do with an oversized
wooden peg............


"First I dismantled the peg to make it easier to
paint and gave it a coating of Starlight Paint


I added a layer of grunge paste through my tree stencil


and allowed this to dry before adding more
Starlight Paint to the raised areas using
Cut 'n Dry foam


I also went back and added to the background
layer with starlights paints applied with a brush


Using Versacolor Ink I stamped in the mushrooms
around the base of the trees and stars all over
the remainder of the peg


Finally, I stamped two little faeries onto vellum
in Versacolor Neptune Ink and cut around them.


I gave them a very light coating of
Dark Orchid Starlight Paint so that they
shimmered and attached them to the peg


I then reassembled the peg


Note that I have done it upside down so that
the peg can stand on my desk as a note holder"


Materials used:

Starlights paints – Emerald, Turquoise, Dark orchid
Versa colour ink – Neptune and silver
Lavinia Stamps


Thank you Louise
these do look fun to make
and would be really
useful gifts too 

That reminds me - I have
a small gift by way of a
big "thank you" to do this
afternoon so if anyone wants
me I shall be away with the faeries......!

'Till tomorrow

Mickie xx


Thursday, 9 February 2017

Starlight Express

Starlight Express


Hi Everyone!

Hope you are doing well
Here is a beautiful project
to help brighten your day
from Craftyfield:

 "I'm new to Starlight paints although I'd read, 
seen and heard a lot about how fantastically 
shiny and awesome they were. I wasn't convinced 
they would be very different to other metallic paints.... 

I have to admit I was very wrong. 
They ARE different, in a way which is 
difficult to describe, the photos do not
give a good enough impression and this
is one I would advise you to see for yourself. 

Also, if you can, watch the videos available 
on the Imagination Crafts website, they 

explain the product better than I can.


To road test the new paints I used a blank 
tissue box and gave it an Eastern inspired makeover.


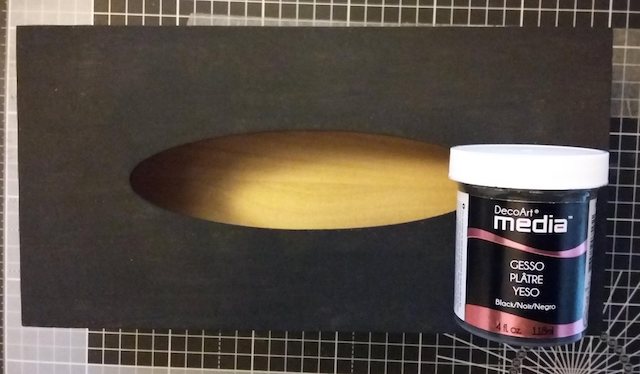
 First I gave my tissue box a coat of black gesso. 
The mat look reminds me of blackboard which I thought 
would be perfect to show off the shine of the paints


Then, I applied Starlight in Dark Orchid (purplish colour) 
at the corners fading to black at the center. 
With the flash, however, what you see is mainly 
flashes of silver metal reflecting the light


Next, I used the Starlight in Platinum (I would describe this 
one as a cross between silver and gold) with a piece of 
Cut & Dry foam to ink my Honeydoo stamp. 
[The palette you can see in the photo is old plastic packaging]


The stamp is very detailed, so on top of wood the impression 
is not perfect but I think this give the finished 
article a unique and personal touch.


Now for the side views...


and the end views...


and a zoom so you can get an idea of the shine...


Supplies:

Tissue box 
Black Gesso
Starlight paints (Black orchid, Platinum) 


Wow!  This is a gorgeous project
and would make a lovely gift.......
birthdays............mothers day.......

Thank you Craftyfield love the sophisticated air

'Till tomorrow

Mickie xx