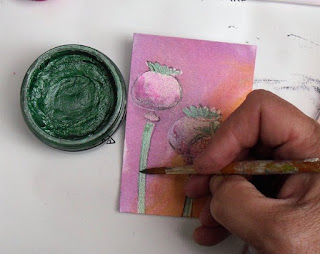
Happy Bank Holiday Weekend!
Well, that's here in England. If
you are elsewhere in the world
I hope you have something
super to celebrate too
Helen Chilton has been taking
the time to have an in-depth look
at Creative Expressions' new
Metallic Gilding Polish and
here she is to tell you all about it
.........
" I've really put this product through its
paces and I have to say I'm impressed.
The colour range is beautiful and it really
buffs up to produce a fabulous metallic sheen.
It comes in a pot like this:
Pull the top to the side to release the sponge
applicator before unscrewing the lid.
It says to prep the sponges with soapy water.
(I only read that halyway through!!!)
However you do need to let them dry a bit
or else it dilutes the polish (or squeeze
them out as much as you can).
And there you have it. it's sort of squidgy!
When not in use the sponge sits in the holder.
You don't have to use the sponge if you
don't want to - you can use
a paintbrush or your fingers as well.
Dip the sponge in and ....
....lightly, using circular movements,
brush over the embossed pattern.
You can also press much harder as on
the right and colour the background as well.
Buff up with some kitchen towel.
It shows up on all colour card:
from left to right: kraft card, white card, black card.
Also try tone on tone: purple polish on purple card.
Here I've added colour on top of the
orange polish - love it!
Try colouring some glossy card and then
removing colour through a stencil -
this polish is water based and comes off
easily with a baby wipe.
Here I've coloured with two polishes -
Tangy Tangerine and Dark Cherry -
and then...
... over coloured with the silver. The sheen is amazing!
This is stencilled with the Silver Dream over
a Tangy Tangerine and Indian Pink background.
The thicker you apply the polish the more raised
the edges of the pattern will be.
Working on glossy card again, I've first taken
out colour with a baby wipe then slightly
moved the stencil and stencilled in Dark Cherry.
This background is done on Yupo - the
polishes did react with blending solution which
was quite interesting. You get a really shabby look.
You can use the polishes to stamp with -
ink the stamp up using the sponge or your fingers.
On the left I've stamped neat,
on the right I've spritzed the stamp with water.
On this one I've added polish over the stamping
and gently wiped it back with a baby wipe.
Here I've stamped and embossed and then
coloured the background.
Just wipe stamped image with a
baby wipe to bring back the colour.
On the left white embossing, on the right clear
embossing on purple card over polished with
Tangy Tangerine.
You can also paint with the polishes.
Just dip in your brush and go for it.
I've tried it out on lots of surfaces here
and I was impressed.
On the whiteboard bottle I heat dried the
polish to give that texture.
This is a Stampbord bag charm on a
stencilled background.
The polish scratches back beautifully.
Look at the detail you can etch in.
I've made use of one of the embossed
backgrounds here.
The panel is edged with the Silver Dream
polish and heated.
As you can see from this card, It's easy to
stamp over the polished surface.
I used Archival inkpads.
Thank you Helen - I think we
are going to have to add at
least one colour of this product
to our stash now we've been
shown what it can do .........
Hope Helen has difused some
of the mystery of the luscious
new Guilding Polish for you
'Til tomorrow
Mickie xx


Fabulous tutorial, I love every sample card and stamps and stencils used on these. These products look great moreover! Thank you Helen x
ReplyDeleteYou certainly did put it through it's paces, very thoroughly! Some of those products looked fantastic. Many thanks for the tutorial, Heather x
ReplyDelete