Morning all,
It's the weekend....yay!!
What have you all got planned...hope it's good!
Don't forget it is the longest day tomorrow, just as we are
getting some nicer weather and longer evenings, we are
halfway through the year and the evenings will get shorter....
....the days colder....and Christmas will be here again.
Yeuch...horrible thought, I love Christmas but they definitely
get closer together as you get older.
Ok, here is our last project for the week using the
wonderful Punch Boards, perhaps you will treat yourself
to one....or two!!
It's Neil's turn today.
Neil says -
I do like these Punch Boards as they make it easy to create
multiple projects making them ideal for party favors and
batch makes. My favourite has to be the envelope maker.
As it says; it is designed for envelopes, but today I thought
As it says; it is designed for envelopes, but today I thought
I'd share a couple of the other things you can use it for.
(I have a post showing how to make envelopes here if you want
(I have a post showing how to make envelopes here if you want
to take a look
http://neelzexpressionz.blogspot.co.uk/2015/02/making-envelopes.html )
http://neelzexpressionz.blogspot.co.uk/2015/02/making-envelopes.html )
So today, how about bows?
And tabs?
Let's start with the bows:
I've made 2 sizes and to save me having to write it over and
I've made 2 sizes and to save me having to write it over and
over again, all measurements are in inches.
So, beginning with the larger bow you need a strip of paper
So, beginning with the larger bow you need a strip of paper
10 x 1 1/2
(I've used plain card decorated with Distress ink and Viva
(I've used plain card decorated with Distress ink and Viva
stamps though you can use patterned paper too which is ideal
if you want to match up your project)
Place the edge of the strip into the punch board and punch.
Repeat for the other side too.
Line up the strip to the 2 line and punch.
Move along to the 5 and punch.
Flip the card over and repeat the 2 punches to do the
opposite sides.
Starting from the other side, line up to 2 and punch, flip
over and punch again at 2.
You then end up with something looking like this.
Use a pen or similar to curve the two inner sections of the card.
Fold the other edges up as seen.
Add glue to the back and fold and glue in place as seen.
Repeat for the other side.
Repeat for the other side.
Glue the bow to the back with some tape to hold it down
if desired.
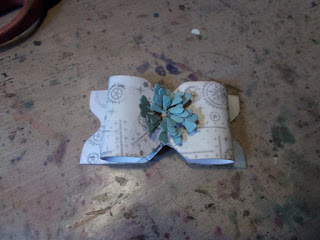
Add a small flower to the middle to finish off.
To make a smaller bow the process is the same but using a
To make a smaller bow the process is the same but using a
1 x 7 1/8 inch strip and punching at 1 1/2, 3 1/2, 1 1/2
(and don't forget the ends too)
Here's a couple. I've varied the placement of the ends to
give a different look.
Then, how about some tabs?
For this I have used 5 x 5 inch card. Once you have got
the principle you can adjust measurements to create
different sizes to suit.
So, beginning with a piece of card, place it so the edge
is on the halfway mark of the punch and punch.
Slide across to the 1 mark and punch.
Trim off the section to the right of the tab with a craft knife and
your first tab is done.
Take a second card and line up the edge with the 1 mark
and punch, Slide across to the 2 mark and punch.
Trim the edges to the left and right to leave your second tab.
Then repeat with your other cards working in the following order
Card 3 : line up at 2, punch, move to 3 and punch. Trim
Card 4 : line up at 3, punch, move to 4 and punch. Trim
Card 5 : line up at 4, punch, move to 5 and punch. Trim
I did this twice which gave me 10 pieces. I cut two pieces of
Then repeat with your other cards working in the following order
Card 3 : line up at 2, punch, move to 3 and punch. Trim
Card 4 : line up at 3, punch, move to 4 and punch. Trim
Card 5 : line up at 4, punch, move to 5 and punch. Trim
I did this twice which gave me 10 pieces. I cut two pieces of
chipboard to size and punched holes. Adding book rings gave
me a mini book ready to be decorated with tabbed dividers......
Thank you Neil, oh I just love that book, might have to
invest in these boards myself!
If you want to have a go, this is what Neil used...
Envelope Punch Board
White Card
Distress Ink
Archival ink - Watering Can
Viva Stamps
Double sided tape
Tim Holtz Thinlits - Mini Tattered Floral die
Distress Cardstock 12 x 12
Blue card
Chipboard
Small book rings
White Card
Distress Ink
Archival ink - Watering Can
Viva Stamps
Double sided tape
Tim Holtz Thinlits - Mini Tattered Floral die
Distress Cardstock 12 x 12
Blue card
Chipboard
Small book rings
Well that's it for another week!
I'll see you tomorrow with our new Weekly Challenge.
Enjoy your weekend.
Jane x


Clever ideas Neil! Especially love the tabs, to make address books the punch would be perfect.
ReplyDelete