
Morning all,
Kicking off a new week here on The Craft Barn Blog,
this week we will be featuring Homespun Wreath and the DT will be
showing you what they have created.....
Ok, today we are starting with a project from our very own
Rachel. Many of you will know her from the shop, not only
as sales but also as a tutor. Rachel is going to join us on
the DT bringing you two projects each month!

Cover the wreath with 2" wide strips off burlap,fixing the start
and finish points using hot glue gun.
Seal the edges with Matte Medium with sponge
applicator in dabbing motion and leave to one side to dry.
The medium should dry clear.

Take the burlap squares and sponge these with Matte
Medium and leave to dry, do the same with the white calico.
The medium stops the materials fraying.Medium and leave to dry, do the same with the white calico.

Spray the calico with Biscotti Perfect Pearls when dry
this will leave a slight shimmer when materials are dry
die cut both the burlap and calico with Tim Holtz
Tattered Florals.

you wish to place them on you wrapped wreath.
Glue the flowers together with hot glue gun.

Thread the buttons with loose threads from the burlap
and knot on the back.

Glue buttons in the flowers.
Decorate the wreath as desired.
With the remaining burlap I sealed down the side with some
strips with glue.

I removed the long threads by pulling
them out.
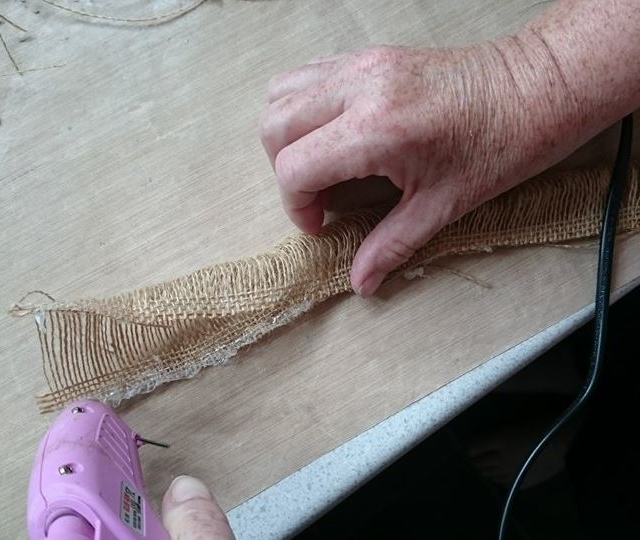
I then folded the strip over and sealed the same
with hot glue. Roll the strip making a loopy flower, these
would make a nice backing for a brooch but turned out too
deep for the look I wanted on my wreath.

Items used -
Sizzix - Tattered Floral Die
Sponge Paint Brushes
So that is our first wreath of this week.
What do you think?
You know we like to hear your comments!
I'll be back tomorrow with another project,
Jane x
So that is our first wreath of this week.
What do you think?
You know we like to hear your comments!
I'll be back tomorrow with another project,
Jane x
This is lovely, I also love the flowers, all gorgeous.x
ReplyDeleteGreat tips, and i love that loopy flower. x
ReplyDeleteThis is wonderful! I love the flowers including the loopy one you didn't use! I can feel some brooches coming on! xxx
ReplyDelete