Showing posts with label Acetate. Show all posts

Thursday, 20 July 2017

Fond Farewells

Fond Farewells


Hi there!

What do retired people do
all day?  All the ones I know
are frantically rushing about
cramming into each day
all the things they always
dreamed of .............

Ah yes, time to 
celebrate ............

.......and to get us started
here's Claire Jackson
with a delightful
 retirement card

"The time to wine down stamp designed by
 Francoise Read for Woodware 
is perfect for collage. 

Together with the new sets of mini archival inks,
 which are great for stamping on glossy surfaces,
 this stamp was crying out to be used on acetate 
for a retirement card.


First I created a background by swooshing
 broken china and peeled paint Distress Oxide inks 
on a craft mat, spritzing with water and dipping 
the card into the ink.

 I kept dipping the card into the ink until
 I had the layers I wanted, with some white 
still visible. 

I also added a few tiny spatters of cactus flower 
archival ink.


Next I stamped the image twice on heat resistant 
acetate, once in leaf green and once in 
cactus flower and heat set it. 

I also stamped it once more on white card
 and completely dried the background 
before stamping it for the final time
 in watering can ink. 

I used a stamp positioner as it is quite 
a large stamp and it really helped to 
stamp it twice to get a dark image and
 catch the bits I missed first time.


I cut the glasses and tall bottle from the
 pink sheet and the round bottle from the 
green sheet. 

I rubbed the cactus flower ink pad over
 the reverse of the pink images,
 wiping off the top part of the glasses, 
before heat setting it.

 I repeated it with the green bottle
 and the leaf green.


From the white card I cut out the labels 
and coloured them with pencil. 

While the cheese, leaf and corkscrew were 
coloured in fossilised amber Distress Ink.


Once all the hard work was done I could 
layer up the pieces, gluing them down 
with glossy accents. 

I added cactus flower enamel accents 
to the grapes, a few white highlights
 with a paint pen and a light shadow 
with a grey pencil.


Although not quite ready for retirement,
 it is time to put my feet up, sit back
 and relax I think!"


Materials used:

white paint pen

Thanks Claire, those Woodware
stamps really lend themselves
to some great techniques don't they?

Anyone running Retirement Training
Courses?  

'Till tomorrow

Mickie xx

Saturday, 24 June 2017

Acetate


Acetate


Hi There!

Well, here we are at the
end of the week with the
last Tutorial in this strand.

Have you had a good week?
Achieved everything you
set out to do?
Had the week from hell?
Settle back and have a
relaxing weekend - that'll
make you feel good again......!!

Craftyfield is here today
with another of her Quirky
Birds.  Remember the Ooops!
Bird?  Well here he is in a
different guise .......


"Of course I knew that enamel accents are 
perfect to make 3D dots or marks, 
but, since they are paints, I wanted to 
try them with a brush. 

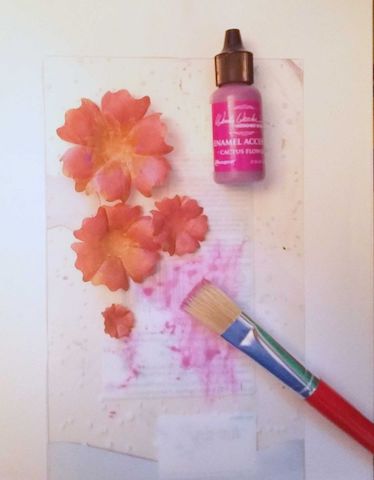
Here, I colour matched some die-cut flowers 
from Crunchy waxed paper.


Still creating embellishments, I tried the 
Enamel Accents on brads for that glossy 3D finish. 
They are opaque enough to completely cover 
the original colour and beautifully glossy. 

What you can see behind the brad is 
my professional tool............ 
a cork which I use to hold brads for 
painting, embossing etc...


I remove the brads from the cork with tweezers 
and plant them in a piece of styrofoam to dry out.


 I then cut out all the cardstock and acetate pieces
 using a variety of dies and my guillotine.


Now for the focal image. 
Acetate is a difficult stamping surface 
but it does offer several opportunities... 

It can be worked on both sides! 

I decided to use Brilliance ink and emboss
 with clear powder to give me a raised impression. 
This will make it easy to contain the colour later. 

This acetate is heat resistant so, as long 
as the heat gun is not too close and you stop
 as soon as the powder is melted, the sheet will not warp.


Another advantage of acetate is that obtaining a 
mirror image is just a matter of flipping the sheet! 

I did consider in fact giving my bird a fellow by doing just that.

 Next time...

 I wanted the grass to be dimensional 
so I am painting it on the "front". 

As I go about painting my scene I will flip 
the acetate for the best effect or easiest way. 

Here I have applied some green Enamel 
at the bottom and spread it with a plastic card. 
Then, with the edge of the card, I dragged 
the colour upwards, creating blades of grass.


Flipping back to the stamped image 
I applied a wash of yellow to the bird with 
a wet brush.

Back to the grass side, I added some flowers
 by just touching the nib of the Cactus Flower bottle
to the acetate. 

With the green I added a few more blades
 to get some over the flowers. 

With the yellow I added the bird's plumage.

For the eyes I used white acrylic
 paint on the embossed side.


I took a second picture with a different angle 
as it is difficult to photograph acetate, 
especially with the shadows created!


These little bottles are a lot of fun to use 
in all sorts of ways (I also tried them with
 stencils but I wouldn't recommend it as stencilling
 does use a lot of paint) and I hope I have inspired 
you to explore this medium in more 
creative ways than just dots!"

Supplies:

Thank you Craftyfield - for
ending our super inspiring
week with another take on Bird 3.
Using the cork to hold the brad
is a brilliant idea too!

I'm off to sort through my
extensive cork collection for a proper
cork (if that makes sense!)?  

'Till tomorrow

Mickie xx


Friday, 23 June 2017

Acetate


Acetate


Hallo Everyone!

Nice to have you join us
for today's blog post/tutorial
by Helen Chilton, who has
been having a lot of fun
with flower stencils and dies
along with the acetate and 
enamels................

"This tag uses the Wendy Vecchi and 
Ranger Enamel Accents. 

Love these as there's so much you can
 do with them and the colours are so vibrant


Put some Garden Patina onto your craft mat 
and get your stencil ready.....


.....then scrape over the Enamel Accents 
in a thick layer and leave to dry.


You can see here the glossy finish that you get.


Die cut some Tim Holtz wildflowers.


Squeeze the Enamels straight onto the die cut 
to give it a raised, glossy finish. 

This is very easy to do as it stays where you put it.


You can draw into it with a cocktail stick if you wish.


Then add Distress inkpad colour over the tag - 
the stencilled enamel will act as a resist. 

I've used coordinating colours here but you 
could quite easily colour over in bright orange 
and not get a muddy mess.


Rub over the Enamel with a baby wipe 
to remove any ink.


Add stamping to the background -
 I used the matching Wendy Vecchi Archival
 inkpad colours.


Add some dots for decoration.


I decided at this point I wanted another flower
 so I just stencilled one with a bit of Cut n Dry 
and cut it out.


I then coloured it with the Electric Lime Enamel 
and looked at how to arrange my flowers. 

These die cuts are great as they're very flexible.


I finished with some white flowers on top,
 a few words and some rope.


You can even decorate the words!


And there you have it - Enamel Accents used as a resist, 
for colouring, to give a raised glossy finish and for doodling."


Materials used:

Stamps used:
Kaisercraft: Postmarks, Blossom

Enamel Accents:
Wendy Vecchi: Leaf Green, Garden Patina, Cactus Flower
Ranger: Lemon Twist, Classic Cherry, White
Tim Holtz Thinlits die: Wildflowers 2
Imaginations Crafts Art stencil: MU43
Distress inkpads: Shabby Shutters, Broken China
Wendy Vecchi Archival inkpads: Leaf Green, Garden Patina


Thank you Helen for giving us
such a beautiful project, not to
mention highly informative tutorial


That will be me getting the enamels out
later on and decorating some wildflower
die cuts.  Think they'll be a really
useful addition to my stash

'Til tomorrow

Mickie xx