Thursday, 31 August 2017

On the Case


On the Case


Hallo There!

"Goodness me!"  She exclaimed, "It
is the last day of the month....already!"

Expect that rings a chord with a few 
of you - I wonder if we were more aware
of the date in the days prior to the IT takeover
of our lives?  Not sure I can remember that
far back........................!


Hazel Harler is here today to share a
book with us..............not just any book
I hasten to add but a very special book....


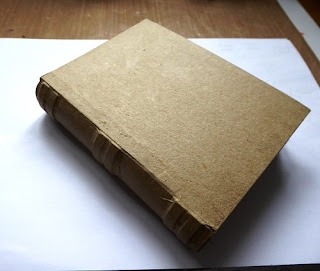
 "Hi everybody, I've a decorated book box 
to share with you today.


I used a paper mache book box.


 I glued some crumpled tissue paper to 
the spine and gave the box a coat of gesso 
inside and out.


I covered the box inside and out with
 some script rice paper.


I painted the spine with acrylic paint 
then I dry brushed some white gold
 Starlight metalic paint over it.


 Some of the embellishments I'm using. 


The frame on the photo was heat embossed
 with aged spice Frantage embossing enamel.

I made the stickpins by attaching some beads 
to a couple of headpins with glue.

The branch was painted green then painted
 with some crackle accents and then I dry brushed 
some white gold Starlight paint.


The finished box. 

I also added some roses and a word sticker
 - the photo is of me and my sister.


 I made some photo cards to go into my box. 
This card was covered with rice paper, 
I stapled some folded flowers to one edge 
and added a wooden butterfly.

The photos are me with my mum and dad, 
I won't tell you what year it was but we had
 all the mod cons - you can just about see 
the mangle behind my dad.


This card is covered with rice paper
and I just added some gems. 

The photos are of us with my grandparents. 

I chose the colours because I always remember 
my grandma in later years always wearing a white, 
purple and green cardigan.


 Card again covered with rice paper, 
I embellished the card with wooden birds 
that I'd painted with Starlight paints. 

This is a photo of my lovely Auntie Nellie.


The card is covered with rice paper,
 I also used another piece of rice paper to
 embellish the card and I added some 
seagull die cuts. 

The photo is me and my sister with dad 
on a caravan holiday.


The cards are in their box and because I didn't
 go mad with the embellishments 
I have room for more cards.

 I've enjoyed making the cards but I think
 words are missing so I'll sort that out later."


Supplies:

Impression Obsession seagull die.

wooden shapes, lace, beads, headpins,
 skelleton leaves, gems.


Thank you Hazel for showing us
some of your beautiful memories 
in your gorgeous memory book


Those rice papers really lend themselves
to this sort of project don't they?  So many
designs to choose from too - bound to be
something to suit every mood and/or taste


'Till tomorrow

Mickie xx

Wednesday, 30 August 2017

On the Case


On the Case


Hallo Everyone!


Hope your week has started off
well and will continue on the up

We have a great week planned
and here is Louise Thomson to
start us off.....


"When my hubby and I got married, 
a friend of ours gave us a 'treasure box' to
 keep all the little bits and pieces you
 gather over the years from dates and 
holidays and such like. 

I loved it so much that I've made one for
 pretty much everyone I know who's got 
married since! 

This one is destined for a friend who is
 getting married shortly and is having
 a literary themed wedding. 

It started out life as very ordinary
 office storage.


I gave the whole box a couple of coats of 
gesso primer.


While the gesso dried, I stamped this incredible 
impression obsession book stamp in archival 
cobalt blue ink.


I kept going until the whole piece of
 tissue paper was coated!


Then mixed some pva and water and 
used it to cover the top of the box.


The base of the box also got a coating in gesso,
 followed by a coating of starlight paint in turquoise.


With the starlight paint dry, I softened 
the look using fresco paint in chalk, which I
 then sanded back. 

I also added in some scraps of paper, 
stencilling, and a few paint splatters for 
good measure!


I made a background card using 
distress oxide inks. I smooshed them on 
to my non stick mat, spritzed with water 
and picked up the colour on the card. 

I repeated this several times, 
drying between each layer.


Next I added some stencilling.


This was followed by some script stamping 
and some die cut birds and lettering.


To the top of the box I added more stencilling, 
this time using grunge paste.
 I repeated this stencil several times to 
build up the background.
 I also added some more of the floral stencil.


Once the grunge paste had dried, I replaced the
 floral stencil and added colour using
 cracked pistachio and worn lipstick distress oxides.


Using some leftover background card I cut
 out some little birds using an impression obsession
 die set.


I fiddled about with the layout for a long time
 adding some gorgeous graphic 45 papers
 and a few little extra details such as the
 stitching in this picture.


A feather quill from a Bo Bunny stamp set.


More inking and stamping


This picture shows up the earlier stencilling better, 
and a little bird die. 

I 'hid' birds perched all around the book shelves
 just for fun.


I looked up some quotes online and found 
this rather romantic one which comes from 
one of my friends favourite books. 

The background here is made by spritzing card
 with color bloom.


Finally the finished layout!"


Materials list;

Office filing box
Fresco paints - Chalk
Paper scraps from stash


Thank you Louise.  Your friend
is going to be so pleased with
her box after all the thought 
you have put into it.  

Such a lovely idea for a wedding
gift.  There are so many bits and pieces that
we collect on our journey through life


'Till tomorrow

Mickie xx


Saturday, 26 August 2017

News

News


Happy Bank Holiday Weekend!
Well, that's here in England.  If
you are elsewhere in the world
I hope you have something
 super to celebrate too

Helen Chilton has been taking
the time to have an in-depth look
at Creative Expressions' new
Metallic Gilding Polish and
here she is to tell you all about it
.........

" I've really put this product through its
 paces and I have to say I'm impressed.  
The colour range is beautiful and it really 
buffs up to produce a fabulous metallic sheen.

It comes in a pot like this:


Pull the top to the side to release the sponge
 applicator before unscrewing the lid.


It says to prep the sponges with soapy water. 
(I only read that halyway through!!!) 

However you do need to let them dry a bit 
or else it dilutes the polish (or squeeze 
them out as much as you can).


And there you have it. it's sort of squidgy! 
When not in use the sponge sits in the holder.
You don't have to use the sponge if you
 don't want to - you can use 
a paintbrush or your fingers as well.


Dip the sponge in and ....


....lightly, using circular movements, 
brush over the embossed pattern.


You can also press much harder as on
 the right and colour the background as well. 
Buff up with some kitchen towel.


It shows up on all colour card:
 from left to right: kraft card, white card, black card.


Also try tone on tone: purple polish on purple card.


Here I've added colour on top of the 
orange polish - love it!


Try colouring some glossy card and then
 removing colour through a stencil - 
this polish is water based and comes off
 easily with a baby wipe.


Here I've coloured with two polishes - 
Tangy Tangerine and Dark Cherry - 
and then...


... over coloured with the silver. The sheen is amazing!


This is stencilled with the Silver Dream over
 a Tangy Tangerine and Indian Pink background. 
The thicker you apply the polish the more raised 
the edges of the pattern will be.


Working on glossy card again, I've first taken
 out colour with a baby wipe then slightly 
moved the stencil and stencilled in Dark Cherry.


This background is done on Yupo - the 
polishes did react with blending solution which 
was quite interesting. You get a really shabby look.


You can use the polishes to stamp with - 
ink the stamp up using the sponge or your fingers.


On the left I've stamped neat, 
on the right I've spritzed the stamp with water.


On this one I've added polish over the stamping 
and gently wiped it back with a baby wipe.


Here I've stamped and embossed and then 
coloured the background. 

Just wipe stamped image with a 
baby wipe to bring back the colour. 

On the left white embossing, on the right clear
 embossing on purple card over polished with 
Tangy Tangerine.


You can also paint with the polishes.
 Just dip in your brush and go for it.


I've tried it out on lots of surfaces here 
and I was impressed. 
On the whiteboard bottle I heat dried the 
polish to give that texture.


This is a Stampbord bag charm on a 
stencilled background. 
The polish scratches back beautifully.


Look at the detail you can etch in.


I've made use of one of the embossed 
backgrounds here.


The panel is edged with the Silver Dream 
polish and heated.


As you can see from this card, It's easy to
 stamp over the polished surface.
 I used Archival inkpads.


Thank you Helen - I think we
are going to have to add at
least one colour of this product
to our stash now we've been
shown what it can do .........

Hope Helen has difused some
of the mystery of the luscious 
new Guilding Polish for you

'Til tomorrow

Mickie xx