Saturday 28 February 2015

Triangles Week - Dawn Heald


Hi everyone,
 and welcome to another weekend.

I know I say it every week but where are the days going???
I know...its a sign of getting old!

Well I have another lovely project for you today.
It is the last one for triangles week and it's
Dawn's turn.

Just look at this....


Didn't I say it was lovely??


This is what Dawn says...

"This week's theme gave plenty of room to play, so many things
 can be done with the humble triangle. I've made a stand up
 triangle card. It really is an easy one to put together and looks
 impressive. I also used the same papers as last week where I
 made a bright card to this week making a more toned down
 or vintage feel by using different inks and background card.
 Showing you can get an entirely different look.


To make - 

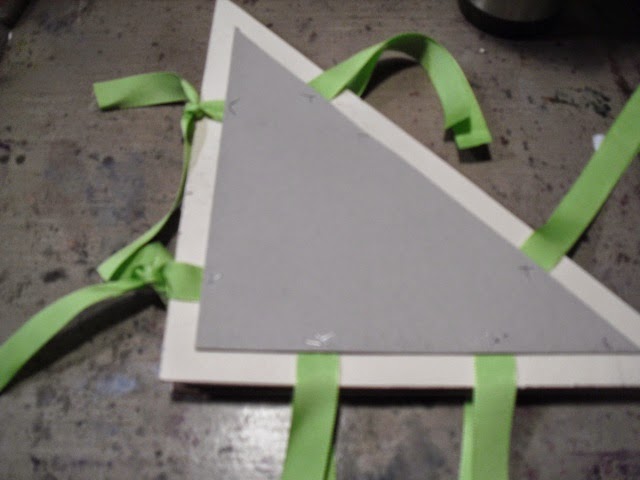
Cut three pieces of Kraft card to five and half inch square.


Fold each in half on the diagonal, corner to corner.


Next from pattern paper cut three pieces five inch square. 


Cut these in half on the diagonal.
Use Vintage Photo Distress Ink and a little Gathered Twigs to edge all your
 card and papers. 
Stick the papers to the Kraft squares as shown.


To put card together -  Lay two squares side by side with points meeting 
in top middle. Take last square with score line pointing straight down vertically,
 slide up to other squares with one one half on top of them and the other
 half underneath. The photo shows what I mean.


Then stand it up and you'll find the sides all fold round to make the
 triangle card.

To secure into a stand up triangle put on the far left a piece of temporary
 adhesive or hook and loop. As you wrap it around it will stay in place.
Then decorate. I've used a sentiment from the new Kaisercraft blue bay
 set as my focal point. The flowers are from a Jofy set.


 I stamped the 
flowers onto pattern paper and when cutting them out I cut the petals
 into a straighter triangle shape and layered together.


 I've used 
Woodware large butterfly punch with Kraft and pattern papers and
 a few pieces of washi tape. Finished with some gems. Well it's not
 a Dawn piece without them.
I do hope you'll have a go at making this. It really is easy. I promise".

How nice is that??
Love the colours!


Dawn used -


From stash
Lined paper, Washi tape

Thank you, Dawn.

So that is our projects for another week, don't
forget to get your entries in for February's Calendar Challenge.
It is a new month tomorrow!!

See you tomorrow with the new words!


Jane x

Friday 27 February 2015

Triangles Week - Neil Walker


Good morning everyone, 

It's triangles week here on the blog.

Neil has been very busy and has a beautiful project for
you today.....this is absolutely amazing!


Neil says "Well I was playing around with no particular plan in mind
 and ended up making this. A multiway opening triangle book.


To start, cut some 12 x 12 white card sheets in half diagonally. 
(You can use any square size though.)


Fold each piece in half.


Fold as seen.


Fold the next piece the same and slide in place onto the first. 
Glue the two pieces together.


Repeat until all pieces are used and set to one side and leave to dry 
(Preferably pressed down to keep flat.
Cut two pieces of card slightly larger than the pages for the covers 

out of thick card.


Cut two smaller pieces and other decorative elements for the covers.
Cut 12 pieces of ribbon long enough to be tied and staple them to 

the smaller triangles.
Add strips of double sided tape and glue.


Adhere to the covers.


Adhere the pages to the covers using tape and glue on the first 
and last page. Leave to dry. So, this is one way to open the book.


Or you can flip it round and open it this way.


Or this way


Or this way too.


As you can see, there are a number of different ways to open it, 
and I've not shown them all to you! It was fun to 
make though.
I've coloured the whole thing with Dylusions inks and left to dry. 


 I've then added stamped details to the covers and wrapped the 
edges with decorative tape too before edging with some 
Treasure Gold.


I have punched holes in all 3 corners with a crop o dile. How you tie
 the ribbons determines which edge of the book stays closed 
and the book rings can be used as well to hold the  covers together. 
If you do not tie any ribbons or use rings you can open the whole book
 out This one stretches to about 1,2m LOL".


Wow Wow Wow!!!!

Who is going to have a go then......


This what Neil used -


Doodlebug Textured Cardstock - Lily White
Kaisercraft Texture Clear Stamp - Script
Kaisercraft Texture Stamp - Butterfly
Ribbon
Archival Ink - Jet Black
Stix 2 Ultra Sticky Clear Tape
Dylusions Ink Spray
Book Rings - 50mm
DecoArt Faux Finishing Medium
Treasure Gold - Classic


We'd love to know what you think of Neil's Book!

Don't forget to get your entries in for February's Calendar Challenge.
(The link will put your pic on but just keeps it in the link.
Unfortunately it just didn't seem to be working properly).
March starts on Sunday, wonder what your next two words will be?
Any guesses???


See you tomorrow,


Jane x

Thursday 26 February 2015

Triangles Week - Pauline Wheeler


Hi everyone,

Welcome to a new week on The Craft Barn Blog.

Thank you to the Q and L winners who have both contacted me and will be
receiving their prize vouchers soon!

Ok, this week on the blog we are featuring triangles.....

wonder what the DT have come up with????

Well, today I am featuring Pauline's  project.


A Scrap Layout Using Triangular Photographs


Swipe the four Distress Stains onto a craft sheet. Using a firm bristle
 brush and your finger flick each of the colours onto your
 white 12x12 card.


Using a larger brush now flick bigger spots of the stains onto the card.


Dry off the inks, then using the stencil apply the gold paste
 randomly onto the card on the left hand side.


 Using a triangle shape, template or a die cut out your photographs,
 mount them onto the turquoise card and cut them out again then
 add them to the right hand side.


Swipe some gold paste across the card and sprinkle the shabby white embossing powder, the mica flakes and glass glitter over it. Heat emboss. 
Don't worry if the powder travels a little, it adds to the effect.


Make three circles with the glossy accents and coil some string onto
 each of them. Allow to dry then dab over them with some of the 
stains. Add a blob of glossy accents to the centres.


Randomly stamp the triangle stamp on the layout using 'bundled 
sage' Distress Ink.


Ink around the layout with 'bundled sage' and 'peacock feathers'
 Distress Inks using a blending tool.

Love this Pauline, very clever use of triangles.


This is what Pauline used -


Don't forget to let us know what you think.
Your comments are always important to us!

See you tomorrow,

Jane x


Tuesday 24 February 2015

Weekly Challenge Winner - Shoes


Helloooo,

I'm back again today to announce the winner of our
last weekly challenge  - Shoes

We had  some fabulous entries, thank you to all those
who took part.  We really hope some more of you decide to have a go.

And so, as usual, using the random generator.....


......and the winner is.....no.1.......


Scrapmate


Congratulations to Scrapmate, please contact me so that
I can sort out your prize voucher!

Thanks to all those who took part, don't forget our new weekly challenge
is anything Tando.


See you soon,


Jane x


Monday 23 February 2015

Q and L Challenge Winners


Morning everyone,

I promised you I would sort out the last two winners
for last years Q and L challenge.
I'm sorry it has taken me a while but here we go......

The penultimate challenge was Heart and Risk
We had 18 fabulous entries and using a random generator,


the winner is........no. 9........

Elaine


Congratulations Elaine!!
Please get in touch so that I can get your voucher sent to you.


Now our second winner is for the last challenge of 2014 Q and L.
This was Faith and Harmony.
For this challenge we had 17 entries, all superb and I'm so
glad we use a random generator as I wouldn't like the job
of choosing the winner.

So, again using a random generator.....


the winner is........no. 8.....

thassos456 


 Congratulations thassos456!!
please get in touch so I can send you your voucher.

I would like to take this moment to thank you all for joining
in with our challenges.  Without you we couldn't do them and I might
feel like I am talking to myself.....blah, blah, blah!
Your entries are always excellent and I hope you enjoy taking 
part and creating your brilliant works of art.  We certainly 
like seeing them.

I'm off now, 'Mr Selfridge' is calling me......

Hope you all have a good week,

I'm back tomorrow with the winner of last weeks 
Shoes challenge.


Jane x


Sunday 22 February 2015

Weekly Challenge


Helloooooo,

It's Sunday again and it is time for a new weekly challenge.

I hope you are all enjoying joining in.
We have had some lovely entries but come on everyone,
we'd like to see more of you entering!!

So what will it be this week.......

....hmmm I wonder.....


how about ....Tando


So what are the rules, well it has to include something
Tando.  That's it.  I'm going to leave the rest to you!

It is after all a challenge and I know you will rise to it!

So what will you do....can't wait to see....

As usual, you have a week, entries close 
midnight March 1st.

Entries via the link.

The winner will receive a £10 voucher and will be announced on
 Tuesday March 3rd.

Good luck everyone!

Tomorrow I will be announcing the winners for the 
last two Q and L challenges for last year.


Jane x


Saturday 21 February 2015

Tando Week - Neil Walker


Hellooooo,

How are we all today??
It's the weekend!


We are thinking about bringing back the Wishing Well, which gave you, our 
important viewers, the chance to tell us what you would like to see here.
  We spend a long time deciding on the products and projects to show
 on the blog but I'm sure there are some of you out there who
 can give us some more ideas of what you would 
like to see.
Please let us know in the comments below what you think. 

It is day four of Tando Week and our last post using these amazing
 products.  Hope you have enjoyed what the DT have made for you!

Today it is Neil's turn, and these are brilliant!
I love what Neil has made....


Contemporary announcement cards


Neil says.... 
"I liked the modern feel of these characters and thought they worked well to create a selection of announcement cards.
Make some cards 4 x 3 inches.


Fold a piece of paper in half and cut out a band as seen.


Slip a blank card into the piece of paper, lay a mask over and begin
 to add colour with Distress Inks.


This creates a lovely neat band across the card.


Repeat this with a selection of masks and colours of inks over all the cards.


Colour the sheet of figures with Black Soot Distress Ink.


Glue the figures onto the cards into various combinations as seen and depending on the occasion. Add details with black pen.


Make envelopes for the cards with the Envelope Punch Board".


Thank you Neil, I particularly like the masked off idea!
Clever?


Well, what do you think?
You know we like to see your comments.


I'll be back tomorrow for another weekly challenge so if 
you are going to enter this weeks Shoe challenge....
...you'd better get your skates on!!!


Jane x

Friday 20 February 2015

Tando Week - Dawn Heald


Good Morning, 


It is day three of Tando Week here on the blog and as usual
the DT have been very busy.

Today we have a lovely card from Dawn.


So bright and cheerful.

Let's see How Dawn made it.....


Cut two pieces of card five and a half inch square.


 From the pattern papers, cut four rectangles to measure 6 inch x 2 inch
 each. Cut each rectangle in half on the diagonal. Ink the
 edges with Dusty concord distress ink.


Arrange pattern papers onto the square card, like rays of sun. Stick down
 and trim any over hang.
Punch or die cut scallop circle from the bottom corner of it.

Punch or die cut another part scallop circle from pattern paper.


Stick your first square with papers on top of the other square you
 cut at the start. Then slot in the scallop circle of pattern paper into the
 bottom corner, sticking to the base piece of card. I added dots of
 silver pen to the pattern of this piece. Ink around edges of square. 
Matt onto silver card. Then Stick to base card.


Next, glue three of the Tando Butterflies onto Pattern paper. 
Leave to dry.


Cut around edges of butterfly and sand
 edges to smooth.  Edge the butterflies with silver pen and decorate
 with clear gems.

Glue these onto your card and then glue on a few buttons and clear gems.


For the sentiment - colour a piece of card with the dusty concord ink, 
stamp sentiment with black from Telegraph road set. Cut into a 
banner shape. Edge with silver pen. Curl piece slightly. Attach to 
card by sticking flat at left side and raised with double layer of foam
 pads in centre.
Edge entire card with black ink.


What an amazing card, I really like the way the papers
are arranged.  Think I might have to try that myself!

If you want to try this, here is what Dawn used -

Tando Mini Butterflies
Prima - 12 x 12 Wishful Thinking papers
I'll be back with a project from Neil tomorrow,

See you then,


Jane x