Showing posts with label Tando Creative. Show all posts

Saturday, 14 October 2017

For the Girls


For the Girls

Hi There!

So here we are with the 
final project in this strand
and what a project it is....

Here's Jane Castle to
show you what she made:

 
The project I have made does take a little time
 to make but then if you are going to give 
someone a handmade present your 
time is the main part of the gift. 

So grab a cuppa and we will make a start.

One of my main hobbies is gardening 
and I like to save seeds for the next 
growing year. 

A very close friend and neighbour is 
a keen gardener also and we
 always give each other birthday and 
christmas presents, nothing expensive but 
always something with a special thought. 

So I decided to turn this wonderful 
mini house into a seed shed for her.


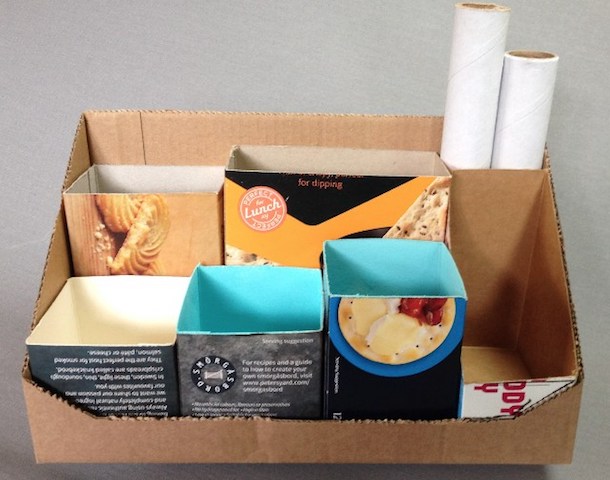
Using Art-C mini house box kit I gave
 the outsides of each part a coat of white gesso.

The inside of the base, back and 2 sides 
were then covered with some of 
Imagination Crafts Rice paper.

 This was attached using 
Ranger Distress Collage Medium.


The distress medium does make the background
 quite a bit darker as you can see 
in the photo above.

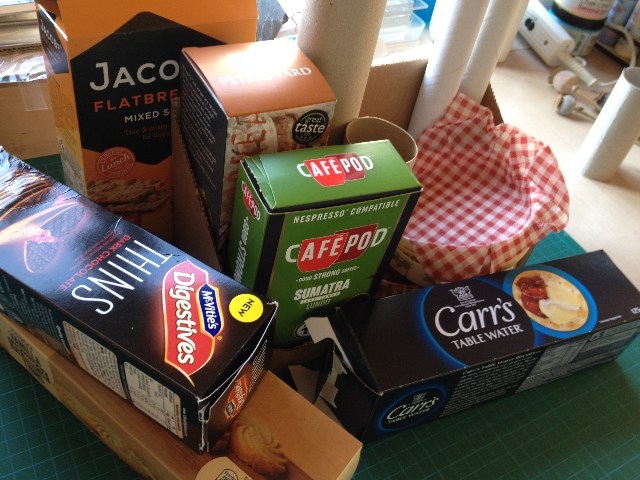
Next I made a start on the seed envalopes. 

For these I used some ordinary brown
 wrapping paper as this helps to keep the 
seeds dry. 

Cutting pieces 10cm x 10.5cm, I then made 
folds so that the finished size would be 6cm x 4cm. 

the corners were cut away so as to 
remove some of the bulk.


In the picture above you can see the various stages, 
the last one has the bottom sealed and 
the top open ready to be filled.

I stamped the labels onto white card using 
black ink and a stamp from JM15. These were then 
lightly coloured using Chalk Cloud blending 
ink before hand writting. 

The envelopes were stamped and heat embossed 
with white powder using various PaperArtsy stamps.


The tag was made from kraft card and also 
heat embossed.

The seed packets were then filled --


and immediately sealed. 
Poppy seeds can go a very long way !!!

At this point I decided to make a sign for 
my shed, so masking off a stencil I 
inked onto a strip of shrink plastic.


This took about an hour to dry and then
 I cut it to shape and punched the holes
 in the top before heating


Now onto decorating the outside,
 the roof had a coat of Granny Smith paint 
before adding Grunge Paste through a Tando mask.

 I added a little Slate paint to the paste 
before applying it to the roof. 

Once dry I lightly sanded and 
added some Treasure Pewter.

The sides and the back were painted in 
Blush paint and then sponged with the 
Chalk Cloud blending ink in Toasted Rose. 

Stamped flowers were added using
 Carabelle Studio 'Zinouk du Jardin'.

Using the same stamp set I made a 
little figure, she was stamped onto
 300gsm card and then cut out. 

Her dress was stamped onto an off cut 
of painted card and stuck on top. 

Colour was added to the figure with 
Distress Markers.


Self adhesive gems for the ear-rings and
 Liquid Pearls for her buttons. 

The spade was stamped from JM 43.

There are holes in the 2 roof pieces so I 
added a ribbon bow and attached the 
'Don't eat the Daisies' tag.

The 'Seed' sign was threaded with some 
silk thread and tied to the decorative edging 
which was painted in China paint.

Zinouk and her spade were stuck on 
with some glue and the seed packets
 popped inside.


As this is a fairly small house/shed
 it's hard to catch the detail of the 
inside on camera.


I have been very impressed with this kit, 
it all went together very nicely.


I might include a battery nightlight to go 
inside for when the seeds have 
been planted.


The bow could be untided and then
 it could hang from a branch on a
 summers evening.

Thinking about it several would look
 very cute!!"


Thank you Jane - I can
just see these little houses
dotted about the garden
holding those little battery 
operated night lights!

Another delightful present
don't you think?......

'Till tomorrow

Mickie xx


Friday, 22 September 2017

Paper Mash Up

Paper Mash Up


Hallo There!

Good to see you!  Here is
another idea in this strand
for re-using the paper/card
that might end up in the
re-cycing bin.

Jane Castle has been looking
through her re-cycling.........

"Hello Everyone, today I would very much
 like to show you how I started with these .......


and ended up with this:


As I'm one of those people that think 
'That might come in handy' I tend to 
have a few empty packages in store
 so this project was fairly easy to make. 

The outer casing was from a Supermarket 
shelf that had been displaying deoderants.


It measures 25cm wide, 12.5cm deep 
and 13.5cm high at the back. 

I then also added a piece of stiff board
 to the back for the clipboard which 
measures 19cm x 23cm.

I played around with the internal arrangement
 before I cut any boxes to size.

Next a made up a spray paint mix ready
 to add universal colour to all the internal parts
 that were not going to be covered with 
decorative papers.


The mix was roughly 2 parts Mermaid,
1 part Beach hut and 2 parts water. 

I sprayed the insides of all the small inserts 
but didnt worry about the base of the
 outer shell as that would not be seen.


The front and sides were then covered with
 Kaisercraft Basecoat IV Collection Broadwalk.


This paper was also used for the clip board--- 
there was just enough left to cover one of the
 small boxes and the 2 tubes.

The remaining boxes were then covered in 
FabScrapes Hoot & Toot. 

2 of the birds from their Scrapping Goodies 
were used for the embellishments.


The embellishments were then given 2 coats of paint. 
The heart I stippled to give an uneven effect.


Detail was then added


  I love poppy seed heads and dry several 
at this time of year to add to various projects -- 
 for this one I cut the seed pod in half 
and then sprayed.


Fancy Cord/ Bakers Twine was added
 to the front and the seed pod.


Adhesive gems were added for the birds eyes
 and once I'd given the larger leaves 2 coats 
of clear embossing powder the stamped detail had 
almost disappeared so I then re-inked the stamp 
and heated the embossing powder again 
placing the stamp into the molten glaze.

Finally some dried grass from a Stipa flower 
was placed behind the butterfly.

This took 2 sheets of 12x12 papers and a few 
embellishments ---- probably things we all 
have in our stash!

The clipboard is to be used for a reminder 
of birthdays for each month."


Items Used


A lovely project to keep us busy
now that the evenings are
drawing in.  Many thanks Jane


I had forgotten about making a
spray with the Fresco paints -
so useful for getting colour into
the nooks and crannies

'Till tomorrow

Mickie xx


Saturday, 2 September 2017

On the Case


On the Case


Hi Everyone


Enjoy the weekend won't you?
I am sure you don't need reminding
that it is back to normal next week

Certainly i have enjoyed getting to
and from home in relative ease and
calm - it will be back to planning
my journeys now the schools are
back ..............

Jane Castle is here today with a
great storage idea.........


Well this was a theme that could lead to 
many different crafting projects but
 I decided to make my 12yr old Granddaughter 
a case for her to keep her ear-rings in when
 they are staying at their caravan. 


I wanted to keep it fun and felt these new 
Whimisical Birds from Tando Creative 
really fitted the bill.

I began by giving the larger of the 2 mini
 book boxes in the set a coat of black paint 
both inside and out. 

Then cut a strip 10cm off the top from 
a sheet of Kaisercraft 12x12 paper.


This 10cm strip was then stuck onto a piece 
of white card to give it some extra strength.

 Starting at the end with the wild flowers
 I made the following score lines;
1.5cm score, 2cm score, 1.5cm score,
 1.5cm score, 2.5cm score, 1.5cm score,
 1.5cm score, 2cm score 1.5cm cut.


These score lines were then folded forming 2 areas
 for the ear-rings to sit in.

 Although these measurements worked for
 my box they might need slightly adjusting 
as I'm not sure as to whether these boxes
 match exactly size wise. 

This was then placed inside the book/box 
and the 2 ends glued in place.


Now onto the bird for the top,

 the face and legs were given a coat of Nougat paint 
and the body a coat of Very Berry. 

The eyes were made from circles punched from
 some scrap blue card and then black gems for the centres. 

The beak was cut from some pale yellow felt and 
faux stitching was added using a fine nibbed black pen.

The body was stencilled using a sponge and 
Cosmic Shimmers Chalk Blending Ink. 

The feathers on the top of his head had 
Enamel Accents applied.


The legs had Enamel Accents for nail varnish
 and the stripes were added using a Sakura Pen.


Finally the wings were given a coat of Wisteria paint, 
then stamped in Archival Watering Can 
and heat embossed with clear powder.


Before attaching the wings I added some 
Treasure Pewter to the edges.

Using the same stencil and Blending Ink 
I added some decoration to the corners of the lid. 

The blending ink dries a lot lighter on the black
 background but you could always give it a 
second coat if you wanted it to completely match. 

The centres had some Enamel Accents added 
and to finish I rubbed the edges of the book with
 the Treasure Pewter.


The ear-rings my Grandaughter likes to wear 
are quite small but I decided to pop a few pairs 
of mine in just to check it worked ok !


I think she will be spending less time searching
 around for lost ear-rings and more time belly boarding 
on the beach.

Items used

Kaisercraft Wildflower 12x12 paper Spring
Tando Creative Whimiscal Birds set 2
PaperArtsy Srapcosy Stencil PS050
Toasted Rose

Little Black Dress, Nougat, Wisteria & Very Berry

Archival Watering Can Ink
Treasure Pewter
Catus Flower & Garden Patina

Ranger Enamel Accents Classic Cherry
Sakura Stardust Pen Purple
PaperArtsy Eclectica EEV06 stamp set

From Stash - 
pale yellow felt, blue card and 2 tiny black gems


Expect your Granddaughter loves
 her box.  She could save rings in
it too.  Thank you Jane


Those boxes lend themselves to all
manner of uses don't they?...........
Such fun!

'Till tomorrow

Mickie xx

Wednesday, 28 June 2017

Undercover


Undercover


Hi Everyone

Are you familiar with the
Cover-a-Card stamps? 
 
I guess we might just be
speaking to the converted
however, if you haven't seen
these before you might 
join the converted by the
end of the week.............

Today we have Jane Castle
with us:

"For my project today I decided to make 
a variation of a toddlers bithday card 
as I thought it might be fun to have 
something to hang on the wall of a 
nursery or playroom.


I began by giving my heart base a coat of
 Titanium White paint on both the front and back.

Then once dry made 2 holes at the top ready 
for hanging. 

Next I built up layers of blue and white paint
 using pieces of Cut & Dry foam.


Once I was happy with my background 
I stamped the Birthday Words in Versa-Mark ink 
and heat embossed with white embossing powder.


 I then cut a piece of white card the same 
shape as the heart and stamped Happy Birthday 
on it before attaching to the back. 
This was done so that the finished piece 
could then have a written message on.

The image was then die cut from various 
odds and ends of patterned card and felt.

 I was amazed at how well the tiny steel 
parts of this creature cut the felt, 
but really like the difference in texture 
to using all card. 

I built up the image first before attaching it
 to the heart as I wasn't quite sure 
of the positioning.

Next onto the 3 balloons --- these are from the 
Tando Mini series. 
They were coloured by dabbing ink straight from 
the ink pads and then heat embossed using 
clear embossing powder.


The ribbon was threaded through the holes before 
assembling the gator and balloons. 
His hands/paws were glued in position after 
attaching the balloon strings.


I have to say I had lots of fun putting 
this together and even now give a little smile
 when I look at the finished piece."


Items Used

Impression Obsession Die 422-N Patchwork Gator
Tando Creative Large Heart
Tando Creative Mini Balloons
Deco-Art Titanium White Acrylic Paint
PaperArtsy Fresco Chalk Lake Wanaka Paint
Stampendous Detail White & Detail Clear Embossing Powder
Brilliance Pearlescent Thyme Ink
Brilliance Rocket Red Ink
Versa-Magic Mango Madness Ink

From Craft-Room Stash:
Off cuts of patterned card
Off cuts of felt
Sewing thread for balloons
Length of ribbon


Thank you Jane - that is a
really nice idea; a card you
can hang on the wall.

Wouldn't mind receiving one
of those myself - it would make
me smile every time I looked
at it too!

'Til tomorrow

Mickie xx