Showing posts with label Alchemy Wax. Show all posts

Thursday, 12 October 2017

For the Girls


For the Girls


Hallo Everyone!

Present time is looming ever closer
and we thought we'd inspire your
crafty instincts.  

Claire Jackson has used one of
the Art-C Display Boxes to get
started:


"I started with the Art-C display kit box.


It comes in 8 pieces and the Perspex panes 
are covered in film to protect them.


I glued the two base, and two lid pieces together 
as per instructions, and gave them a coat 
of black gesso. 

I then decided that the top looked 
a little plain and added some Kaisercraft 
wooden embellishments before 
gessoing them too. 

It is really important that you don’t get paint
 in the slots for the panes or they won’t fit in.


 Next I gave the lid and edges of the base 
a coat of Imagination Crafts Rusty Patina 
in verdigris. This has a lovely gritty texture


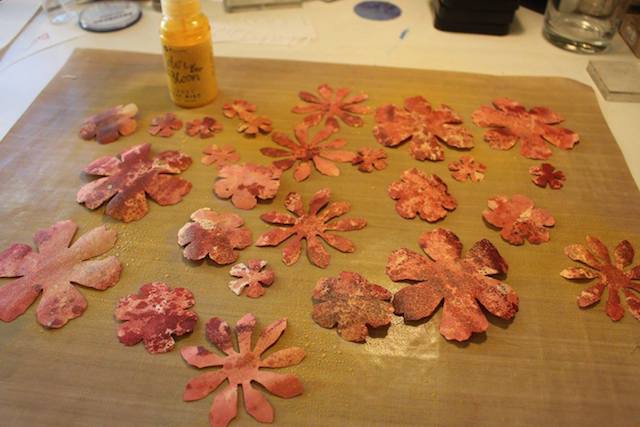
I added a few more embellishments 
before using my fingers to dab on DecoArt
 worn penny and a little matte black paint.


While the paint was drying I started on the 
glass vials to go inside.


To get a deeper colour I first put a few drips 
of alcohol ink inside each vial and turned
 them around to coat the inside


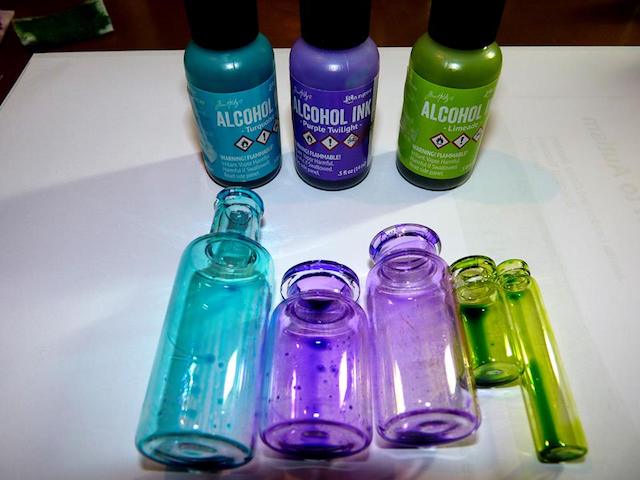
Next I used a felt applicator to add the same
 colour to the outside. 

I then added a second colour to the outside
 of each vial to get a marbled effect.


 I then added drips of copper mixative.


 I lightly rubbed gold Alchemy Wax on the 
butterflies and added enamel accents.


 I added embellishments to the vials before
 assembling the box. 

The kit is so well designed that the pieces 
fit together very tightly without glue so 
if you wanted you could take the lid off 
at a later date. 


 With the reflection it was difficult to photograph. 


This project makes a pretty present 
in its own right but you could, 
if you wanted to, fill the vials with essential oils 
as an extra gift "


Thank you Claire.  Love what
you have done with the bottles
I can almost smell the essential
oils I imagine are in them.......
lovely......


This particular display kit would 
also showcase a small treasure
or two..... you know the sort of
thing you have put away safely
in a drawer so you don't lose it
and then hardly ever see it....!

'Till tomorrow

Mickie xx


Friday, 31 March 2017

Silhouettes

Silhouettes


Hallo there!

Another lovely day
and I hope, a happy one

Certainly Claire Jackson is
set to make us smile with her
beautiful project, so let's get
going........


"Cut a piece of yupo 10cm x 10cm. 
Use a piece of masking paper or a post it
to create a mask for the moon. 

Using a felt applicator dab spots of aqua alcohol ink 
over the entire piece of paper. 

On a clean piece of felt pad put a few drops 
of blending solution and go over the aqua 
to create a mottled background.


Tear a piece of card to mask off the upper part 
of the square and create a hill line. 

Apply turquoise ink below the mask. 
Go over with blending solution. 

Move the mask down and add purple twilight 
around the bottom. 

Remove the moon mask and add a mixture of 
turquoise and purple alcohol ink around the 
edges of the square. 

Make sure a few dots overlap the moon
 to create the impression of depth.


 Stamp the rabbits in black Archival ink. 
(Touch up any pale bits with a black Sharpie.)

 Along the bottom, stamp the fairy buttercups
 in cobalt and deep purple. 

Stamp the mini leaves around the sides 
and top in cornflower blue and cobalt. 

Add a couple of drops of aqua ink to a baby wipe 
and gently dab onto the moon to create depth.


Add black stems with a fine permanent pen 
and white highlights with a gel pen. 

Add a very pale grey edge to the moon 
with an alcohol marker.


Stick the top layers of the printer tray together 
and paint the tray and stand in Fresco Finish eggplant. 

When dry, stamp the tray (not the stand) 
with small flowers in mermaid and sherbet. 

Wait for it to be completely dry and paint 
a thin layer of translucent blueberry over the top. 
The flowers will just show through. 
If it’s too thick just wipe it back with a baby wipe.


Rub on a thin layer of pink tulip Alchemy Wax, 
again using a baby wipe to take off any excess. 

It’s hard to see in the photos but it adds a delicate shimmer.


Run a clear embossing pad along the edges
 and emboss in silver embossing powder. 

Cut a piece of patterned paper to go on the back of the tray. 


Assemble all of the pieces together"

Materials used:


Alcohol ink: purple twilight, turquoise, aqua
Archival ink: jet black, cobalt, cornflower blue, deep purple
Alchemy wax: pink tulip


Thank you Claire for such a fun project
Another for my 'To Do' list.......


'Till tomorrow

Mickie xx

Friday, 30 December 2016

Dimensional

Dimensional


Today we have Dawn Heald  to 
show us a beautiful bowl she has created:


I've made a shaped button bowl and I'll be honest it was meant to be a flower bowl. However, with a slip of my scissors and a couple plasters later, it changed. I'm overall pleased as these make handy little bowls easy to get at the contents.

You can make papier mache shapes using a variety of different sturdy objects. Just wrap in plastic wrap/cling film first to prevent the paper sticking to your objectives.


To make this project.

Choose object shape to use as a Mold. Cover with cling film first to prevent the paper sticking to your object. Tear small pieces of book pages and glue them all over your object. Build up as many layers as you like depending on how thick you want it. Leave to dry naturally.
Then remove object from the papier mache. You may need to cut down it to prise is off. If so simply use small pieces of book pages and glue back together. Dry and then trim and neaten edges to get shape you want. Neaten further by sanding and applying glue on very edge.
Paint all over with watered down white gesso


When dry apply colour all over using Alchemy Wax using sponge and or paintbrush.


Now make some embellishments with Shell Mold and paper clay, painted with Starlight Paint and Pink Alchemy Wax. Make some little fishes by Stamping Fish stamps onto Frosted shrink plastic, die cut, colour with clear sparkle pen and shrink with heat tool.


Back to the bowl, sponge edges and stamp the little asterisks all over the outside with Black Stazon Ink. Then add dots of White PVA glue all around outside. Dry.

Stick embellishments around outside of bowl. Add further decoration with buttons and Peacock Stickles.


The finished bowl from all angles:


Products used: 
Imagination Crafts Alchemy Wax: Peridot, Japanese Jade, Cobalt, Pink Tulip 
Imagination Crafts Starlights Metallic Paint: Pearl, Orange Oxidized 
Heartfelt Creations Under The Sea Stamps, 
Heartfelt Creations Under The Sea Die set 
PaperArtsy Lin Brown stamps ELB15
Woodware Seashells Mold 
Paper Clay 
Polyshrink Shrink Plastic: Sampler Pack 
Cosmic Shimmer White PVA Glue 
Stickles Glitter Glue: Peacock 
Stazon Ink Pad: Jet Black 
White Gesso
Multi matte medium
Wink of Stella clear pen


Thank you Dawn for showing us how to go about
making these beautiful bowls.


That's all for today folks!!

Mickie xx

Friday, 16 December 2016

Happy Christmas

Happy Christmas


Hallo Everyone!


Here's a versatile wreath you can keep
from one year to the next or make as
a gift.  Brought to us by

Louise Thomson


Well it really isn’t long until Christmas will be upon us
 and so I wanted to share a project that
 could be used as a card or a decoration. 


Start by smooshing a selection of distress inks
 across a non -stick craft mat. 
I used ripe persimmon, fired brick and seedless preserves. 
Spritz this all over with water.


Press a sheet of white 12”x12”paper in to the ink
 and repeat a few times as desired to get a 
good coverage and colour on your paper.


Use the tattered florals die to cut as many flowers 
from your sheet as possible. 
With a bit of jiggery pokery you should be able to get quite a few!

Spritz the flowers with colour bloom to give them a lovely gold shimmer.


Use alchemy wax applied with your finger to add more gold highlights.


Place each floral component in the palm of your hand
and run the back of your thumbnail along each petal 
to give them a slight curve. 
Layer them together in twos or threes, 
fixing them with 3D foam mount pads


Arrange the flowers in to a wreath and stick down. 


Coat a piece of white card in antique linen distress ink 
and add highlights using tattered rose. 
Run the card through a die cutting machine 
with a woodgrain effect embossing folder 
then add a layer of ground espresso ink 
to highlight the texture. 

On a rectangle of white card, stamp and emboss 
a Chirstmas greeting using gold embossing powder. 
Ink up with more antique linen distress ink
 then stamp the vine around the edge in 
antique linen to give subtle detailing.

 Layer the components together and finish
 with a dot of gold stickles glitter in the centre of each flower.


Happy Christmas!


Materials used;
Distress inks– ripe persimmon, fired brick, seedless preserves

A lovely wreath Louise and the flowers
and sentiment would also make a lovely card.  

Thank you very much

That's me off to make my wreath
See you all tomorrow

Mickie xx