Showing posts with label Yupo. Show all posts

Saturday, 30 September 2017

Drunken Chalks

Drunken Chalks


Hallo Everyone!

Hope you've had a good month
and achieved most, if not all,
you have set out to do.

Don't worry if you haven't -
there's always next month.....

Here is Angela Radford with
the final instalment in our
chapter of alcoholic delights:

 "Hi all. I've been having some fun playing 
with Distress Oxides, together with
Surgical Spirit and  Hand Sanitizing Gel 
both of which contain Alcohol.

I have used these with a variety of different 
papers and card and got some interesting results.


Normally I have used the Distress Oxides with water
 which reacts nicely but with the Surgical Spirit 
the effect is quite different and I'm happy to say
 that the inks move around in interesting ways. 

This was on a very smooth stamping card. 

I used a dropper to apply the surgical spirit to the paper.


It's also interesting to see how different the effect
 is on different papers. 

This one was slightly more glossy. 

On this sample I sprayed the surgical spirit 
onto the paper.


 This test was done on Velum, love it. 
Again, sprayed the surgical spirit though I also 
tilted parts of the velum to encourage some 
movement of the liquid.


Here you can see the effect of stamping with 
the Hand Sanitizer.

It reacts with the ink really quickly.


And a close-up. 

Will definitely be playing with this technique again.


Tried this on Yupo too by spraying. 


I would advise sealing all of these when dry. 

Although the colour didn't move when dry,
 it will be effected by water if reactivated.


But of course you will want to see what 
I've done with some of these. 
So I took some card blanks and 
started with some stamping.


Then some stamping on one of the sample 
pieces which I cut out.


 For the stamping I used some PaperArtsy stamps 
available at The Craft Barn.


 I cut out and attached a section of the Velum
 for this card and then stamped over it 
and heat embossed the image.


More stamping then added some of the cut out
 circles, sentiment and Gems. 

The little dots around the edge were done 
with a black pen.


Here you can see the full card.


Couldn't resist making another.
 I used a different sample for this one.


And the full card. 


Hope you enjoyed watching me play
 as much as I enjoyed doing it. 

Happy crafting, Angela xXx"


  Products used:
Sanitizing Hand Gel
Surgical Spirit


Thank you Angela - 
for another super
tutorial.  Always great
to see the enthusiasm
you bring to the project


I would never have thought 
of hand sanitising gel!  Must
try this one so guess what's
on my shopping list this week!

'Till tomorrow

Mickie xx


Wednesday, 24 May 2017

Vintage Chic

Vintage Chic


Hallo Everyone!

Here we are with a new topic
and some super new projects

Helen Chilton is going to start
us off.  Over to you Helen.....

"This project uses Brushos, 
but this time on Yupo paper. 
They give a much softer effect on the Yupo.


Start off by VersaMarking your stamp and 
then rubbing in dry the three colours of Brushos.


Spritz with water and stamp repeatedly........


..........until you've built up a whole background.
 Looks a mess? Don't worry.


Blot it back with kitchen paper...........


.......and hey presto! A lovely soft, muted background
 with just traces of the stamp image here and there.


Next stamp one image onto Yupo as before
 using a Stamp Positioner if you've got one.


Let it dry and then ink up just parts of the stamp
 with Watering Can Archival inkpad and stamp.


Keep going, picking out details, until you're happy. 
Add extra diamonds from the stamp in grey 
round the edges.


Echo the diamond shapes in the stamp 
by stencilling in yellow over the background.


It will then look like this.


Use the Tim Holtz Mixed Media Thinlits die set 1
 to cut out the corners of your background and 
overlay on scrapbook paper. 

Then cut some more out of blueish paper 
and use the actual cut shapes.


Lay the top shapes slightly offset to create 
an interesting pattern.


Cut a hexagon background for your main images 
and add border stamping in grey. Add brads


Add fibres and beaded embellishments.


And here's the finished piece:"


Materials used:


Lovely Helen, thank you very much

Something  little bit different but very
versatile.  Would make a wall hanging,
a book cover, or even a card front....

Been a while since I gave my Brushos
an airing - now might be a good time


'Till tomorrow

Mickie xx


Friday, 31 March 2017

Silhouettes

Silhouettes


Hallo there!

Another lovely day
and I hope, a happy one

Certainly Claire Jackson is
set to make us smile with her
beautiful project, so let's get
going........


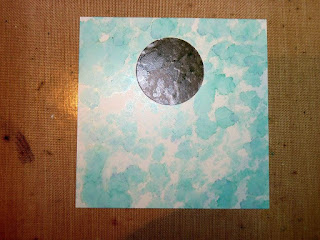
"Cut a piece of yupo 10cm x 10cm. 
Use a piece of masking paper or a post it
to create a mask for the moon. 

Using a felt applicator dab spots of aqua alcohol ink 
over the entire piece of paper. 

On a clean piece of felt pad put a few drops 
of blending solution and go over the aqua 
to create a mottled background.


Tear a piece of card to mask off the upper part 
of the square and create a hill line. 

Apply turquoise ink below the mask. 
Go over with blending solution. 

Move the mask down and add purple twilight 
around the bottom. 

Remove the moon mask and add a mixture of 
turquoise and purple alcohol ink around the 
edges of the square. 

Make sure a few dots overlap the moon
 to create the impression of depth.


 Stamp the rabbits in black Archival ink. 
(Touch up any pale bits with a black Sharpie.)

 Along the bottom, stamp the fairy buttercups
 in cobalt and deep purple. 

Stamp the mini leaves around the sides 
and top in cornflower blue and cobalt. 

Add a couple of drops of aqua ink to a baby wipe 
and gently dab onto the moon to create depth.


Add black stems with a fine permanent pen 
and white highlights with a gel pen. 

Add a very pale grey edge to the moon 
with an alcohol marker.


Stick the top layers of the printer tray together 
and paint the tray and stand in Fresco Finish eggplant. 

When dry, stamp the tray (not the stand) 
with small flowers in mermaid and sherbet. 

Wait for it to be completely dry and paint 
a thin layer of translucent blueberry over the top. 
The flowers will just show through. 
If it’s too thick just wipe it back with a baby wipe.


Rub on a thin layer of pink tulip Alchemy Wax, 
again using a baby wipe to take off any excess. 

It’s hard to see in the photos but it adds a delicate shimmer.


Run a clear embossing pad along the edges
 and emboss in silver embossing powder. 

Cut a piece of patterned paper to go on the back of the tray. 


Assemble all of the pieces together"

Materials used:


Alcohol ink: purple twilight, turquoise, aqua
Archival ink: jet black, cobalt, cornflower blue, deep purple
Alchemy wax: pink tulip


Thank you Claire for such a fun project
Another for my 'To Do' list.......


'Till tomorrow

Mickie xx