Showing posts with label So Soft paints. Show all posts

Friday, 10 March 2017

Bag It

Bag It


Hallo everyone!

I have decided that one cannot
have too many of these bags.
They seem to make even the
most mundane items look as
though a special purchase
has been made


Here's Hazel Harler with her
gorgeous bag 

"This is my decorated bag using the So Soft fabric paints


I started by putting a piece of corrugated card 
inside the bag, this was to give me a firm surface 
to work on and stop the paint from going through
 to the other side of the bag. 

Sorry about the photo, I didn't realise that the 
shutters on my camera hadn't opened properly.


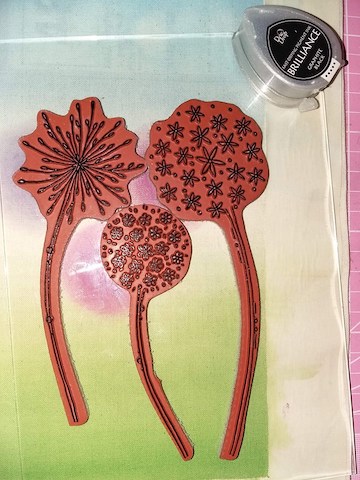
I used a sponge the add the paint.


 I mounted some small Gelli plates onto 
acrylic blocks and used them like stamps 
to add the colour,

 I must admit that I like this and wonder 
if I should have stopped there.


Then used a sponge to stencil the paint onto the bag.


I stencilled some flowers.


I used some indian ink markers to give 
the flowers a bit more definition

I also added some white dots here and there"


Thank you Hazel, that
really is a versatile design


I'm thinking that you could stop
at any of the stages and still
have a stunning bag.  I would
go so far as to say that you could
make a series of bags and stop
the decoration of each one at
the end of the different stages

That'll be the birthdays sorted for this year then....

'Till tomorrow

Mickie xx


Thursday, 9 March 2017

Bag It


Bag It


Hallo everyone!

Today's project would make
a really special gift bag and
here is Louise Thomson to
tell you how she made it


"Start by applying a couple of coats of the 
base colour – Green Apple So Soft fabric paint, 
to a canvas wine bottle bag. 

I wanted a fairly natural look with rough edges 
and plenty of the canvas still showing


Mix the green apple paint with a tiny bit of 
‘So Soft’ tangerine to get a terracotta colour 
and apply through a stencil. 

I used two different designs of the same 
Kaisercraft mini mix stencil

Once completely dry, stamp the Honey Doo 
Floral Chaos design repeatedly on to the canvas. 

My ink pad was running low and I ended up 
re – stamping the image several times.

 I thought it was going to be a disaster and 
need ditching but I should have had faith – 
there is no project that can’t be rescued!


Using tangerine and dark burgundy So Soft paints, 
paint in the flower heads, mixing them to create a variety of tones


Once you are happy with the paint and 
have allowed it to dry, go over the stems in a 
sakura gelly roll pen. 

Add in dots of bisque liquid pearls around the 
stems and also to add centres to the flowers


Finally, bag a bottle!
 I tied the bag with the hessian style chord provided
 and added three coordinating paper flowers 
which rather handily were in a Craft Barn 
goody box I purchased recently!"


Materials used-
So soft paints in green apple, tangerine and dark burgundy
Paper flowers (from stash)


Thank you Louise - a super project.

Didn't I tell you it would be special?
I'm sure you agree this is a beautiful
way of presenting a bottle be it a
full bodied red or a bottle of blackcurrant juice!

The So Soft paints, by DecoArt, are really nice to 
use too and come in a good range of colours

'Till tomorrow

Mickie xx

Wednesday, 8 March 2017

Bag It


Bag It


Hallo Everyone!

How're you today?  Well
I hope and having a great
week.  

Not sure I'm full of the 
joys of spring but today's
project brought to us by
Craftyfield might have
a lot to do with it!


"Since last year's introduction of the plastic 
bag charge in the UK I make sure I always have
 a bag with me, preferably one that is light 
and that I can fold and shove in my handbag. 


A crafting opportunity... 

As this is my first time using So Soft paint, 
I decided to put it through its paces and 
test several ways of using it: 
as a wash (like watercolour), to stencil with, and to stamp with.


This is the bag before transformation. 


To prepare it for colour, I have ironed it and
 inserted a rigid piece of cardboard with some paper
 on top to absorb any excess water or paint seeping 
on the wrong side.

 I also masked out the area of my painting.


The So Soft paints are quite pigmented so for my sky 
I have prepared a mix of Mediterranean Blue paint and water 
in a small container and brushed some water on 
what will be my sky.

 As I go down the fabric I add more water
 to the mix fading the blue to (almost) nothing.


 I have repeated the process with green for the grass 
and lastly in the middle with the Buttermilk.


 Next I used a small sponge to stencil circles
 with So Soft paint using a DIY stencil. 

These will be my flower heads.


To stamp my flowers I used Brilliance ink in Graphite Black. 
I tested on a separate piece of fabric and found
 that Versafine and Archival stamped equally well,
 but not better than Brilliance, and I find 
easier to wash Brilliance off from the stamps... 

To make sure the ink was wet enough 
I topped it up with the re-inker before starting.


 Here I'm using 2 of the smaller flowers from the 
stamp set as a filler.

 A small piece of plastic packaging serves as a 
palette(bottom right) and I have spread paint thinly on it.


Now for the stencilling.... Again I'm using my DIY stencil, 
the distressed diamonds have been die-cut with 
the Mixed Media Thinlits set.

 I mixed Buttermilk and Dark Burgundy paints 
to get the pink I was after.


And finally a close up taken in natural light. 


I still have the reverse unpainted so I can have more crafty fun!

I liked the So Soft paint very much, as it is easy to use
compared to traditional fabric paints and they are
 indeed soft, which might not seem like a big thing 
for a bag but, as I said, this one will spend its life folded
 in my handbag so cracked paint is out of the question!"


Supplies: 
Cotton bag natural:
So Soft paints:
Paper Artsy EKC02:
Brilliance Dew Drop inkpad in Graphite black:
Brilliance ink reinker in Graphite black: 


Thank you Craftyfield for your beautiful bag
Love the depth of shading you have achieved

These paints really do work well, although I never
thought of adding water to them and using as a wash.  
That was a masterstroke.


'Till tomorrow

Mickie xx


Friday, 13 November 2015

Anything Goes - Neil Walker


Hi everyone, 
As I said before, I have given the DT
a bit of a break so that they can recharge their
batteries!

I thought this was an amazing project
and one that could easily be changed
to make a lovely reusable
Christmas prezzie.


A bottle bag, beautifully decorated with So Soft paints


This is the front


A closeup of the front detail


Here is the back


This is what Neil said.....


"Begin by ironing any kinks out of the bag


Start to add your images to the bag using Archival
 ink pressing down a bit longer than you would
 if stamping on card
 to allow the ink to penetrate the fibres


Build up your design, masking where required till
 you are happy. 
(Repeat on the back of the bag too)


Now, remember the saying, mix too many colours
 together and you'll end up with mud? 
Well, this is where you find out it's true.
 Mix DecoArt So Soft Fabric paint, Christmas
 Primary Red, Ocean Blue, Cadmium Orange,
 Cadmium Yellow into a pot and you will
 end up with a funny brown/grey colour
(of course, I could have used brown but
 where's the fun in that?)


Keeping a pot of water handy, begin to
 apply the paint to the bag, avoiding the main
 stamped areas and using plenty of
 water to lighten and spread the colour.
 Every now and again
 you can work in a bit of blue,to add 
interest and depth. Use a large brush for the
 main areas and switch to a smaller
 brush around the images.


Once you have done both sides of the bag; either
 leave to dry or iron just to dry it out a bit 
(Using a craft iron rather than
 the iron you use to iron your Sunday best!)

 Now it's time to add some colour to your
 main images. Using the same colours as before,
 and water, add colour to your
 images. (I also used Yellow Green) I used 
tiny amounts of the "mud" colour to kind
 of dull down the colours where needed.
 It's also a good idea to iron the section you
 have done prior
 to adding a different colour adjacent to 
prevent bleeding.


When you have done both sides and are happy, 
leave to dry. Then turn the bag inside out 
and paint the top section with 
the remainder of your "mud" colour
 mix (assuming of course 
that like me, you ended up with far too much.)


Allow to dry, turn right side out again, and
 give it a last press with a hot iron.
The bag comes with a loose string tie cord which
 I attached to the side of the bag by 
sewing it on with string.


Once I had knotted the string around the cord I 
added a tag to the string and knotted it on.
 The tag had been stamped with
 a tag image from the stamps and I coloured
 it with some of the
 left over paint so the colours matched.


Now all that was left was to find a bottle worthy to be
 carried in such a stylish bag..."


So, what do you think...
What a brilliant project and really nice and unusual gift.


Do you want to have a go?
This is what you will need -

I used Christmas Primary Red, Cadmium Yellow,
 Cadmium Orange, 
Ocean Blue and Yellow Green

Are you going to try this....let us know
if you do....with pictures!!

See you tomorrow,

Jane x

......