Showing posts with label Coloured Card. Show all posts

Wednesday, 1 March 2017

Street Art


Street Art


Hallo Everyone!

Well it is March 1st today -
time continues to fly by 
at an alarming rate........
......that means we are all
busy people............enjoy!

Angela Radford is with us
today to start the new theme
with a fantastic card for
the star in your life......

"Hi all, I'm back to show you what I've been up to 
with these gorgeous Seth Apter stamps. 

To start the Masterboard for this project I began 
by brayering paint onto an A3 sheet of card.


You can see from this photo that you must be prepared 
to make some mess so make sure you have your 
workplace well protected.....or is it just me that's messy!?


I continued to apply the paint until satisfied with the coverage. 
I used a set designed by PaperArtsy for Seth Apter. 
I also mixed some of these colours to increase the range available


 Next I started stamping. 
It's important when stamping with acrylics to 
spread the paint evenly across the palette otherwise 
it will be too thick and you will not get a clear image


More stamping fun and here we are with the completed Masterboard.


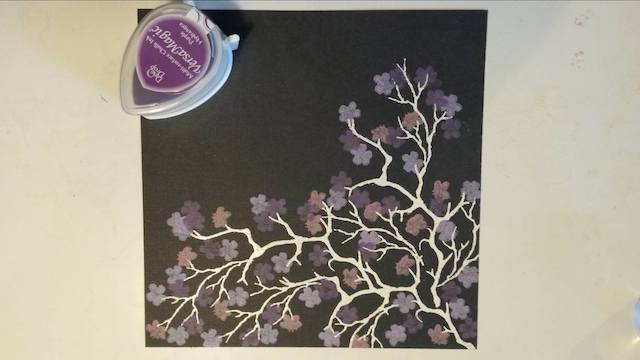
 When I do projects like this I hate wasting the paint 
and I found myself with too much of the Mahogany 
on my palette so thought I would stamp it 
onto a clean sheet of card........
well this just changed my original idea for this card!


So to put all this together I began by creating a 
Z-fold card.


Cut all the pieces to size including some 
deep red card for matting and we're ready to go!


Started layering the pieces together, not bad for some waste paint!


 I completed this by adding some red brad stars 
from my stash and the TIME AFTER TIME stamp image 
from the same Seth Apter set. 

The sentiment is by Tim Holtz stamped with Mahogany distress ink. 


Hope you enjoyed watching me make this card. 

Happy crafting, Angela"


Yes, we did enjoy you making this card Angela
Just love it when you show us your change of
mind and the thought process behind it - just
goes to show there is no need to waste a thing

'Till tomorrow

Mickie xx


Saturday, 25 February 2017

Rice Paper


Rice Paper

Hi there!

Today is the last day
in the Rice Paper set.
Hope you have enjoyed these
projects as much as I have

Today's project will take
your breath away...........

Here is Hazel Harler to
talk you through her
gorgeous project:


" I needed to make a thank you card for a neighbour
 and thought it would be nice to make a tea light card.


I searched the internet for a template and
 found one made by Crafters Companion. 
I cut the card and box from green card


I covered the card and box with a some pretty rice paper
 and attached some ribbon and lining to the inside of the card, 
then I die cut a window in the top of the box.


I glued a piece of acetate insideof the window 
and glued the box to the card 
leaving the opening for the tealights at the top


I lightly dry brushed some white acrylic paint 
on the front of the card being careful 
not to cover the birds. 

The two flowers were stamped onto tissue 
paper with black archival ink


I stamped some script onto the cover and then 
cut out the flowers and glued them to the card.


I coloured a tag with watercolour and stamped the flower. 
I'm going to write a note on this for my neighbour.
 The box was filled with tea lights."


Many thanks Hazel.  I'm sure your neighbour
was delighted to receive such a lovely Thank You


This would make a really nice card/present
for every occasion.  

'Till tomorrow

Mickie xx


Wednesday, 18 January 2017

Card-I-O

Card-I-O

Hallo Everyone!

We have a new theme this week:
Card-I-O stamps 

The DT have been keen to show
what they make of these stamps - 
and it is all good..............

We start off with
Louise Thomson


One of the lovely things about versa magic ink pads 
compared with others is that they maintain their colour 
when stamped on dark card. 

I wanted to make the most of this quality for my project 
and so worked with a black base card for a bit of a change.


Start by inking up a branch stamp with clear embossing ink. 
Sprinkle with white embossing powder, 
tap off the excess and heat to set. 

I used branches from two different Card-i-o sets stamped several times, 
but one would do fine. 


Stamp the small flower from the sakura blooms set using spring pansy ink 


Stamp the side-on flower in pink petunia. 


Add more flowers using purple hydrangea. 


Finally add in some leaves using Aloe Vera. 


Now for the slightly nerve wracking bit... 
line up two nesting square dies 
and cut your image in to three squares. 


Mount each square on a piece of white card with a narrow border. 
Layer them up together and stick down with double sided tape.

Add finishing touches with a stamped butterfly 
and dots of stickles glitter in the centres of the flowers."


Materials used


Card-io Stamps: Summer wreath, Sakura blooms, Pleasant Pastures
Versamagic inks in spring pansy, pink petunia, purple hydrangea and aloe vera Nesting square dies
Stickles – diamond


Lovely project Louise.  Thank you.
Makes me think that Spring is not so
very far away......

'Till tomorrow

Mickie xx


Saturday, 14 January 2017

Bokeh

Bokeh 


Hi there!

How're you doing?  Trust all
is going to plan in your corner
of the universe .....................

To round off the week's bokeh
techniques we have Angela Radford
to show us how she goes about it

Get comfy and prepare to enjoy:


"This is an official name for a specific photographic  effect.
It comes from the Japanese word for 
haze : 'boke'  and blur: Boke-aji.
It is basically the aesthetic quality of images 
out-of-focus in a photograph. 

Crafters have found ways of reproducing this effect without a camera.

There are various ways of achieving this effect 
with both wet and dry techniques. 
The one I am using today is probably the most messy 
but I know that my crafting friends out there don't mind 
getting their hands dirty! 


So here goes.

For this technique you are best using watercolour paper 
as we are going to be getting it nice and wet.

So first you will need to attach the paper to a craft mat 
with masking tape as the paper is likely to warp when wet.


Next cover it thoroughly with water,
lots of it as you need the paint to spread. 
I have started adding colour here and it shows quite well 
that the paper is very wet.

I have used Paper Artsy fresco paints for this 
and you need to add enough water to them 
so they are more like a wash 
then apply them around the paper  
allowing them to blend slightly.

It may look a little dark at this stage 
but remember it will go lighter when dry. 
You can blot it if you wish to remove some of the colour. 

Remove the masking tape and dry it by either 
leaving it to dry naturally or use your heat gun

It should now look something like this:

If the paper has distorted I place it under my craft mat 
for a couple of  hours which will flatten it out again

Now you can start to add the dotty images 
though actually you could use any shape you like 
but I like dots as they are easy to find in different sizes. 
You can use a stencil or dabbers for this. 

I used a white pigment ink at different intensities 
until I was satisfied with the coverage.

And it's time to decide how you will use the Masterboard.
But before I do that I have another practice piece that I tried 
to see how this technique would look with coloured dots too 
and here is part of the Masterboard I made but what do you think?

These would make great background papers for all kinds of projects.                                                                                        
I decided to use sections from both Masterboards to make a card

I needed a background so decided to try the technique 
on a black card blank and I really like the effect.

I played around with the layout for a while before making 
a decision about the design. 


It was during this stage that I decided to use both Masterboards.

I used small dew drops from my stash 
to finish the card which just adds that 
little bit of sparkle which is so perfect 
for this technique.


Hope you enjoyed watching me make this. 
Give it a go, it's great fun to do.
Happy crafting,
 Angela x"


Materials used:
Masking tape.


Echo that Angela!  

Many thanks for a super project.


I'm off to make some master boards 
So very useful to have in your stash, 
especially if you have limited time
or, like me, an awful memory.....

'Till tomorrow

Mickie xx