Showing posts with label Distress Stains. Show all posts

Wednesday, 30 November 2016

Red & Gold

Red & Gold


Hi there!

It's the last day of November
Such a quick month 

Our theme this week is Red and Gold
and Jane Castle is here today 
with a beautiful card:


I started this card with a piece of 300gsm white card which was coloured with Fresco Chalk paints in Plum, Very Berry and Claret. Once these were completely dry I added some Distress Inks in Aged Mahogany and Fired Brick with a blending tool.


Next I stamped the leaves from PaperArtsy EDY12 
and the trellis from Jofy 12 in Fired Brick and whilst wet 
lightly brushed over some Cosmic Shimmer Mica Powder in Antique Red.

Once trimmed to size the centre was then die cut 
with a Spellbinders die and embossed.

The top was stamped with ‘How Does Your Garden Grow’ 
from ELB03 and heat embossed using gold embossing powder.

The bottom section was then stamped with the flowers from Jofy 12
 in versaMark ink and heat embossed using clear embossing powder.


Next I made the centre piece for the aperture, 
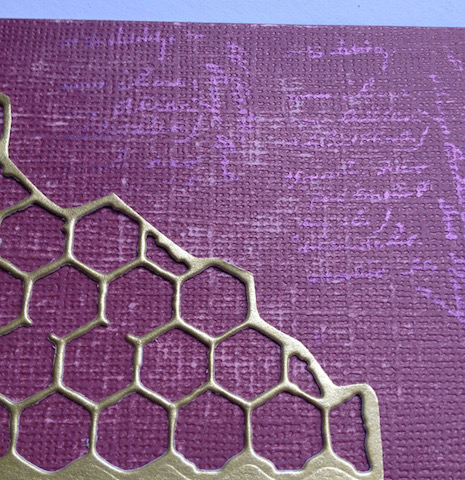
for this I used some Core’dinations sand it, tear it in dark burgundy
 and lightly sanded before stamping with a text stamp 
in Brilliance Crimson Copper ink and also 
brushing with the mica powder.

The honeycomb was cut from gold card 
using a Tim Holtz Thinlits die.


The lace was coloured with Distress Stain in Antique Bronze 
and attached to the back of the aperture with double sided tape, 
adding the pleats in as it was secured.


The flower came from a Tando Grab Bag


This was coloured with the Antique Bronze Distress Stain 
and the texture on the petals came from liberally applying
 Distress Stain through the sponge top.

The centre was decorated by applying Grunge Paste 
through the stencil, then when dry 
adding some Treasure Gold in Ruby.

The edges of the petals were hi-lighted with Aged Mahogany ink

The swirl was cut from some darker gold card 
using a Crafty Individuals die.
This was then cut into 2 and stuck behind
 the aperture to secure


The dragonfly brad was coloured with Renaissance Treasure Gold.

Materials Used


A lovely card with lots of texture
and techniques

Thank you Jane


Well I'm off to make some cards
see you all again tomorrow

Mickie xx


Friday, 1 July 2016

Honey Doo - Neil Walker


Hi everyone,

Welcome to another week here on 
the blog!
I have to tell you with sadness that
this is the last post from Neil 
as a DT member!  Neil has been with
us a long time and his projects have always
been so inspiring.  We will definitely miss him
but wish him all the very best with
what he will be doing and don't forget you
can still find him at 
neelzexpressionz.blogspot.co.uk

And he leaves us today with what I 
think is his best project ever!
I'm definitely going to have to steal this...
it is so beautiful!


Stamp the border stamp onto the tag so
that the top and bottom goes off the page as seen.


Cut away the edge as shown. Stamp the
 border onto scrap paper and cut the butterflies
 out and use as a mask.


Stamp over the tag using the heart stamp with
 green and yellow archival ink.


Attach a piece of patterned card to create
 the tag shape again. Add a little colour
 to the tag with Distress Stains


Stamp and cut out three of the butterflies 
onto scrap card, colour with Distress Stain
 and attach as seen to add dimension.


Attach ribbon and a suitable sentiment to finish.


Wow, love it, thank you Neil!

this is what Neil used ....


Let us know what you think!

I'll be back tomorrow,

Jane x


Thursday, 26 February 2015

Triangles Week - Pauline Wheeler


Hi everyone,

Welcome to a new week on The Craft Barn Blog.

Thank you to the Q and L winners who have both contacted me and will be
receiving their prize vouchers soon!

Ok, this week on the blog we are featuring triangles.....

wonder what the DT have come up with????

Well, today I am featuring Pauline's  project.


A Scrap Layout Using Triangular Photographs


Swipe the four Distress Stains onto a craft sheet. Using a firm bristle
 brush and your finger flick each of the colours onto your
 white 12x12 card.


Using a larger brush now flick bigger spots of the stains onto the card.


Dry off the inks, then using the stencil apply the gold paste
 randomly onto the card on the left hand side.


 Using a triangle shape, template or a die cut out your photographs,
 mount them onto the turquoise card and cut them out again then
 add them to the right hand side.


Swipe some gold paste across the card and sprinkle the shabby white embossing powder, the mica flakes and glass glitter over it. Heat emboss. 
Don't worry if the powder travels a little, it adds to the effect.


Make three circles with the glossy accents and coil some string onto
 each of them. Allow to dry then dab over them with some of the 
stains. Add a blob of glossy accents to the centres.


Randomly stamp the triangle stamp on the layout using 'bundled 
sage' Distress Ink.


Ink around the layout with 'bundled sage' and 'peacock feathers'
 Distress Inks using a blending tool.

Love this Pauline, very clever use of triangles.


This is what Pauline used -


Don't forget to let us know what you think.
Your comments are always important to us!

See you tomorrow,

Jane x