Showing posts with label Starlight Paint. Show all posts

Wednesday, 13 December 2017

The Christmas Table

The Christmas Table


Hi there!

We're nearly there!  Just time
for to get that Christmas table
set up and ready for the biggest
meal of the year!

Forgotten the napkin rings?  
Worry not, here's Helen Chilton
 some Christmas napkin rings
 using a JOFY mini stamp and Starlights.


"I've used micropore tape but equally you
 could use tissue paper. 

Measure the circumference of the ring and
 stick 6 strips to a craft mat or waxed paper.


Paint over with Starlights Pearl.


Stamp the leaf and berry design along the 
pieces of tape.


Paint with more Starlights: I used Emerald,
 Apple Green and Red/Dark Orchid.


Wash over with some Rich Gold.


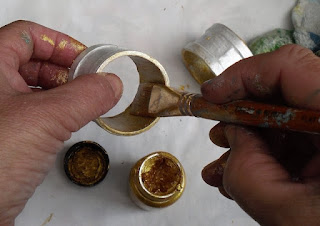
While that's drying, paint the gessoed napkin rings
 in Pearl and the insides and edges in Rich Gold


Peel off the tape....


..and stick to the ring


Paint Emerald round the edges...


...and then a pattern with the 
Rich Gold over the top.


Add wired beads and bells to finish.


Here's a close up:"


Products used:


Thank you Helen for a fabulous project
They look so rich and festive!

Aren't they lovely Everyone?
l might just have to make a
set myself!

'Till tomorrow

Mickie xx

Thursday, 16 November 2017

Crafty Emotions


Crafty Emotions


Hallo Everyone!

Good to see you!  Do you
know anyone with a pre-
Christmas birthday?....

You do?....

Well here's a gorgeous
card from Craftyfield


 "Succulent, or cactus (Cactii) as I know them,
 are in trend in the crafting world and as soon 
as I saw the Craft Emotion set I knew I wouldn't
 be able to resist!

 It has several elements, enough to build up
 a complete rockery...


I first stamped all the images on the sheet
 and fussy cut them to help me decide on
 a composition.

 I settled on using only 3 elements to keep
 things relatively CAS. I used my fussy cut
 images as masks to stamp on watercolour
 paper with Brilliance ink in black.


 I coloured the image with Inktense pencils.
 Keep it light, you can always add colour later...


I then used a wet brush to "melt" the colour
 on the paper. After this first wash was dry,
 I re-applied pencils where I needed more
 contrast or more intense colour.


For the background, I wanted lots of shine,
 so I used Starlight paints, applied with
 a brayer all over a piece of cardstock. 

You can see the shine, in fact that
 is pretty much all you can see, 
despite the weather being decidely cloudy

I put together my card by matting the

 focal image onto Art-C glitter card in
 black, adding a sentiment stamped in 
black ink on a piece of white glitter card.
 
I really like that card it's non shedding glitter,

 sturdy but still die-cuts easily, and it shines...

So nice I added another piece of white 

glitter and used Enamel Accents to create
 faux brads.


Without proper sunlight it is difficult to show how nice
 the glitter looks, but I thought you might want 
to see how well it stamped, as I was concerned
 this would be a problem, especially as the
 script on this stamp is quite small. 

I should say that I did enlist my trusty stamping 
platform to stamp the sentiment and I did 3 inkings
 to get the intensity of black I wanted.

You may wonder why cactus for a birthday card
 and I'm mulling over several funny sentiments
 I can add to the inside. 
"No need to be prickly, you're not that old" 
or similar. 

I would be grateful for your suggestions

 so don't hold back and add your
 comments below...please... pretty please?

Supplies: 


Thank you for a great card
Craftyfield and also for making
us all smile.....

Well, I laughed out loud
I know a few people who 
are feeling a little prickly
over their birthdays right now...


'Till tomorrow 

Mickie xx


Wednesday, 30 August 2017

On the Case


On the Case


Hallo Everyone!


Hope your week has started off
well and will continue on the up

We have a great week planned
and here is Louise Thomson to
start us off.....


"When my hubby and I got married, 
a friend of ours gave us a 'treasure box' to
 keep all the little bits and pieces you
 gather over the years from dates and 
holidays and such like. 

I loved it so much that I've made one for
 pretty much everyone I know who's got 
married since! 

This one is destined for a friend who is
 getting married shortly and is having
 a literary themed wedding. 

It started out life as very ordinary
 office storage.


I gave the whole box a couple of coats of 
gesso primer.


While the gesso dried, I stamped this incredible 
impression obsession book stamp in archival 
cobalt blue ink.


I kept going until the whole piece of
 tissue paper was coated!


Then mixed some pva and water and 
used it to cover the top of the box.


The base of the box also got a coating in gesso,
 followed by a coating of starlight paint in turquoise.


With the starlight paint dry, I softened 
the look using fresco paint in chalk, which I
 then sanded back. 

I also added in some scraps of paper, 
stencilling, and a few paint splatters for 
good measure!


I made a background card using 
distress oxide inks. I smooshed them on 
to my non stick mat, spritzed with water 
and picked up the colour on the card. 

I repeated this several times, 
drying between each layer.


Next I added some stencilling.


This was followed by some script stamping 
and some die cut birds and lettering.


To the top of the box I added more stencilling, 
this time using grunge paste.
 I repeated this stencil several times to 
build up the background.
 I also added some more of the floral stencil.


Once the grunge paste had dried, I replaced the
 floral stencil and added colour using
 cracked pistachio and worn lipstick distress oxides.


Using some leftover background card I cut
 out some little birds using an impression obsession
 die set.


I fiddled about with the layout for a long time
 adding some gorgeous graphic 45 papers
 and a few little extra details such as the
 stitching in this picture.


A feather quill from a Bo Bunny stamp set.


More inking and stamping


This picture shows up the earlier stencilling better, 
and a little bird die. 

I 'hid' birds perched all around the book shelves
 just for fun.


I looked up some quotes online and found 
this rather romantic one which comes from 
one of my friends favourite books. 

The background here is made by spritzing card
 with color bloom.


Finally the finished layout!"


Materials list;

Office filing box
Fresco paints - Chalk
Paper scraps from stash


Thank you Louise.  Your friend
is going to be so pleased with
her box after all the thought 
you have put into it.  

Such a lovely idea for a wedding
gift.  There are so many bits and pieces that
we collect on our journey through life


'Till tomorrow

Mickie xx