Showing posts with label Tim Hotz Dies. Show all posts

Wednesday, 22 March 2017

Up The Wall


Up The Wall


Hi there!

I'm so excited - just realised
that coming Sunday is not
only Mother's Day in the UK
but it is also the beginning of
British Summer Time!

Woohoo! 

Right.  Calming down......
......now...

Angela Radford is with us
today with a tag to make
you smile.......

"For this project I started with a white tag 
and using a Tim Holtz stencil, 
I applied the Grunge Paste


Once this was dry I replaced the brick stencil 
and secured it down with masking tape.


Over this stencil I placed the Cobweb.


 Next I used a variety of distress inks
 to build up the colour of the bricks


Once I had achieved the colouring I wanted
 I removed the stencils and allowed the ink to dry


 I replaced the stencil on the right side to complete the wall.


 Now it's time to add more colour to the textured section
 adding darker colours to make the bricks stand out.


 I completed this with some black which I think 
gives a more realistic effect to the bricks and also edged it too.


And here is the tag completed and ready for the detail to be added.


 I used the Tim Holtz Wild Flower die and some 
odd bits of sprayed paper from my stash 
and attached these to the tag


And here is the finished project. 


I completed the tag by adding the Tim Holtz Crazy Cat, 
a spider from one of Tim Holtz stamp sets, 
Stickles glitter Glue, and a ribbon.

Here is a close up:


 Hope you enjoyed watching. 

Happy crafting, Angela xXx"


Oh what fun!  Really made
me smile all over my face!

Thank you Angela for a super start to my day

 'Till tomorrow

Mickie xx


Thursday, 12 January 2017

Bokeh

Bokeh


Hallo Everyone!

Our current theme has a bit of a
magical flavour to it and here is
Jane Castle who has given bokeh
a fairyland twist

Sit back and enjoy:

"When the theme Bokeh appeared on the list of topics 
it was something I had not come across before 
so I had to do a little bit of research first 
but now I'm afraid it could become a little addictive! 


To begin with I started with 2 pieces of A5 white card 
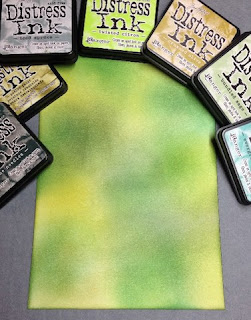
and coloured them with Distress Inks and a blending tool.
The first was a collection of various shades of green.


And the second piece I decided to combine different colours 
but also graduate from light to dark down the length of the card.


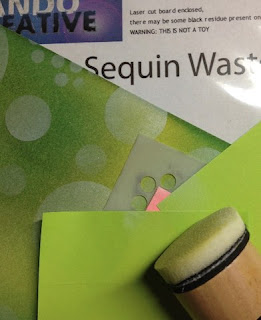
Next comes the fun part ---- I cut some different size circles 
out of a piece of ordinary copier paper to use as a stencil 
and with a clean round blending tool started to add circles of
 Brilliance Moonlight White ink.


I didn't reink the pad every time I made a new circle as I wanted to give the appearance of depth to the background.

I also wanted a few much smaller circles so masked off parts of the sequine waste stencil by Tando Creative


The 2 pieces of card then had to be left to dry completely
 before adding any stamping etc.


With the green background I decided to cut a square 
to use with some Lavinia Stamps and for this 
I just stamped onto the card with black archival ink, 
matted this onto a piece of yellow card and then a piece of green. 

The 4 corners were cut from matt black card 
using Tim Holtz ATC and Corners die.

The paler end of the other piece I really liked 
so cut a tag from this and stamped another Lavinia image 
using archival Watering Can ink.


This is such an interesting way of producing great backgrounds 
that can be varied from the quite subtle to bold and vibrant 
depending on your colour pallet.

if one had a session of making several Bokeh backgrounds 
to have as a stash they would be a great stand-by 
for making a quick card which we all need sometimes"

Materials Used


Thank you Jane - I think it would be
lovely to while away an afternoon
making backgrounds in all
colours to add to one's stash

In fact, I might just do that on
my next free afternoon!

'Til Tomorrow

Mickie xx