Showing posts with label Alcohol Markers. Show all posts

Wednesday, 14 December 2016

Collage

Collage


Hi everyone

How're things with you?  Still calm
and relaxed?! ....................... 
You've not been to the shops then?!

Am continuing the collage theme today
with a lovely card from Claire Jackson


For the theme this week I have taken a Carabelle Studio collage stamp 
which includes different elements and forms combined in the one stamp. 

This technique uses yupo synthetic paper and alcohol ink 
and is great to create an effective background quickly. 

Cut a piece of yupo 21 x 7cm. 

Use alcohol markers to roughly colour a sunset sky.


Add a couple of drops of turquoise and aqua alcohol ink to a felt applicator 
and sponge over the top of the sky


Add a drop of raspberry to a clean felt pad and build up the sun. 

Use limeade to build up bushes along the base. 

Use clear blending solution to mix the yellows and oranges together


Add a few drips of blending solution towards the top of the sky 
and let the alcohol spread to create clouds. 

You can go back in with the alcohol markers to add smaller details or define hills or bushes

The inks dry very quickly and can be stamped over in Archival ink.


Stamp the collage image in jet black Archival ink 
before trimming and mounting on a card blank. 

I added a sentiment but it would work equally well without


Supplies:


 Thank you Claire for the
background technique it
makes a beautiful card

See you all tomorrow

Mickie xx


Friday, 7 October 2016

Dimensional


Hallo everyone - me again!!  
How are you all? It really is the season of mists and mellow fruitfulness now isn't it?  Definitely need to make sure I have a jacket on when leaving the house of a morning.  


Today we welcome new DT member 

Claire Jackson 

with her delightful Birdcage project:


Here she is to tell us all about it:


1.Stamp the Hearfelt Creations bird cage four times.


2. Place the matching die over the stamped image and tape down to prevent it from    slipping. The die cuts very closely to the image for a very delicate result.


3. Colour the die cuts and don't forget to colour the back too. I used Promarkers so I picked a pale pink for the reverse so that it would not show if it seeped through to the front.


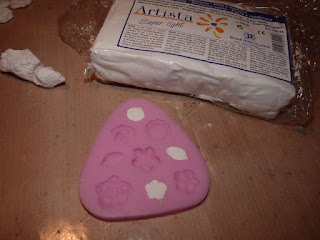
4. Using Artista super light air dry clay and silicone moulds make some flowers. You can take them out of the mould straight away and they are robust enough to handle and colour. Left for 24 hours they become papery and light.


5. I also made some other casts but in the end only used the owls.


6. Glue a selection of flowers and leaves to the top of a small round box (diameter 5.5cm). Colour with alcohol pens.


7. Fill the gaps with PVA glue and sprinkle Stampendous shabby white embossing enamel liberally over the lid. Shake off the excess and set with a heat tool.


8. Tape the bird cages to the edge of the box. Do alternate sides first. Then bend the tops to meet in the centre and secure with a glue dot. Finish by adding two owls, some flowers, glitter and a ribbon.