Showing posts with label Color Bloom. Show all posts

Saturday, 29 July 2017

Woodn't it be Lovely?


Woodn't it be Lovely?


Saturday Greetings to you!

No, I'm not sure what they
are either but I feel it does
make Saturday sound a
little special!

In many ways it is sad that
weekends and weekdays 
just seem to run into each
other but oh, I could not
count the times when I've
been grateful for the shops
being open all weekend....

Proof if ever there was that
you cannot please all the
people all of the time!

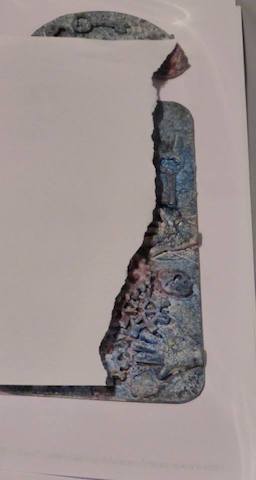
We have Claire Jackson here
today to show us what she
has made of the Kaisercraft
Wooden Flourishes


" Hi!  I think they are very versatile. 
I’ve used them for altering books and boxes,
 making frames and card embellishments
 and with summer in full swing,
 I thought they would be great for making
 some co-ordinating jewellery.
 

First I sprayed some Color Bloom 2
 marigold ink into a glass pot to paint with. 

You can spray directly onto the wooden 
piece but it is a bit wasteful 
for such a small item. 

Make sure you give the bottle a good shake
 so that the mica is completely mixed in.

 I painted two layers on the bird cages 
to get a deeper colour. 

If you want a more pastel look,
 paint a white layer first in chalk acrylic
 paint which will give a partial resist.


Next I painted the swallows.
 Don’t forget to turn them so they face
 in different directions. 

I only added a second layer across 
the wings to create some shading.


Heat emboss the shapes by pressing 
one side onto a clear embossing ink pad 
and dipping it into clear embossing powder 
before melting it with a heat tool. 

I repeated this three times to 
build up a nice smooth finish.
 
If you are quick between layers you
 don’t need to re-ink as the embossing
 powder will stick to the warm layer below.


Try experimenting with different combinations
 of shapes and colours. 
You can paint two different colours
 onto one piece, but I would advise
 being a little more patient than I was
 and make sure the first colour is completely
 dry to minimise them bleeding together.


Finish off with gems and jewellery findings. 


They are a great idea for inexpensive presents 
or if you are holding a craft stall at a fair."


Materials used:

Kaisercraft wooden flourishes pack: bloom, antiques
Color Bloom 2 spray mist: dragonfly blue, fir needles, pot marigold
Clear emboss ink pad:
Detail embossing powder: clear


Well, I certainly did not see
that coming Claire!  Thank you
so much for yet another super idea!


So, that was the last project for
this week.  What did you think?
I really enjoyed seeing what was
inside the box and will look at
the contents more closely now

'Till tomorrow

Mickie xx


Wednesday, 26 July 2017

Woodn't It Be Lovely?

Wooden't It Be Lovely?


Hi There!

Have you seen the little trays
of wooden embellishments
by Kaisercraft?  I'm rather
taken by the trays but keep
wondering whatever would I do
with the contents ...............

.............Enter The Craft Barn
Design Team ............... first off
here's Craftyfield with a tag:


"I hate thowing away any of my supplies 
and since I have full sheets of the 
wonderful Imagination Crafts Rice papers
 (have you seen the full range available
 at the Craft Barn?) I decided to use up
 the left overs from other projects 
in this one tag. 

They don't match but no worries, 
that's where sprays come in!


 I selected these pieces which I then 
glued on my gessoed tag with 
gel medium.


 I'm trying out my composition...


I added a bit of metallic shine with 
Imagination Crafts Starlight paint
 in Mint and a stencil.


Whilst I had the paint out I used it to 
colour match a piece of card. 

I also added the paint sparingly 
around the tag.


Now onto sprays to give the various papers 
a cohesive look. 

On the right these are 2 of the new colours 
and on the left one of the first released colour.

For those who are familiar with the 
older Prima Bloom sprays, the new ones 
present several differences:

 the bottle does not come ready mixed with water,
 the clear packaging has disappeared 
and finally
 the spray mechanism is different.

It's too early for me to give a definite
 review of the new spray bottles but at 
first sight they are as good as the previous ones, 
which, in my opinion, were fantastic.

 The spray is much finer and so doesn't 
make the paper so wet as to warp as much.


I used a brush to paint my embellishments, 
wooden flourishes from Kaisercrafts, Life's a beach 
also with the Color Bloom sprays


I kept two of the embellishments bare and 
matted on a roughly gessoed square of 
kraft cardstock. To knock back the white, 
I used Distress Oxide in Faded Jeans."

Supplies:

Thank you Craftyfield - that is a
gorgeous tag

Such a clever idea to use all
those bits we seem to
accumulate because they are
too nice to throw away......
.....actually, they are aren't they?!!

'Till tomorrow


Mickie xx

Thursday, 23 March 2017

Up The Wall


Up The Wall


Hallo Everyone!

Claire Jackson is with us
today to share with us a
beautiful canvas of her
holiday in Rome

You might need to get 
yourself a cuppa and
a comfy chair ............


"I primed a 30x25cm canvas with white snowflake paint 
and added strips of decorative tape to create some 
texture in the background


 Next I built up the background with layers of Fresco Finish paint, 
starting with more opaque colours and then translucent colours on top.
 I wiped back the paint over the tape where it was too opaque.


To continue to build up the background I used a 
dark translucent paint sponged on a small script stamp, 
gold paint sponged on a large pattern stamp 
and sprayed golden walnut through a stencil.


 I added embossing paste through the brick wall stencil
 to some areas of the canvas


The edges were shaded with pine needles Distress Ink 
and Alchemy Wax was used to highlight the edges 
and some of the brick.


 I stamped and embossed the wording 
in white detail embossing powder on wax paper.


I used a dark brown watercolour pencil between the bricks 
to help them stand out.


Next I tore strips of the wax paper and scrunched them up tightly, 
before lightly rubbing them over with the gold wax.


A mini cardboard key was painted and edged with gold wax.


The photo was die cut and attached to the canvas 
and to create more texture I added a mixture 
of gems, microbeads and embossing enamel 
to the corners and around the photo


 I also sprinkled embossing enamel in places over the background


The photo was taken in the ancient Roman town
 of Ostia Antica, just outside Rome.


 If you ever get the chance to visit 
I would thoroughly recommend it."


Beautiful canvas Claire, thank you for
sharing it with us.  A wonderful moment
of what must have been a wonderful holiday


'Till tomorrow

Mickie xx


Thursday, 5 January 2017

3D Bloom


3D Bloom

Hi everyone!

Here is another project from
Angela Radford using the gorgeous
3D Bloom Color Sprays

Arm yourselves with a cup of
something that cheers you
put your feet up and
prepare to be entranced:

I decided to decorate a door hanger for
this project 


and started by using a
Carabelle Studio Mask - Industrial Mechanic -


to apply Grunge Paste. 


I rotated the stencil to apply the second
part so that the whole of the hanger was covered with
a matching pattern 


Once dry I sanded the edges
and then applied a thin coat of Gesso
to seal the card.  It s a good idea to do
the back too as it prevents the card from
warping when damp


I also wanted to make some dimensional embellishments
for the project and used a Mod Podge told - Industrial -
to fit with the mask


I also moulded some hands


Next I started to apply the embellishments
over the background


which I gradually built up until it was
ready to add the colour:


Always allow one colour to dry before
adding the next one to prevent them
from blending and going muddy


Once this stage was completely dry, 
I masked over parts of the hanger and
sprayed Worn Leather around the edge


The colours look a bit dull at this stage but 
don't worry, it will change soon.....

I took the tap from the Carabelle Studios - 
The Heart Has Its Reasons - stamp set


onto card and built up the surface with
embossing powder.  

Start with ink followed by a layer of fine powder
followed by layers of ink and UTEE until you
are happy with the hope and then stamp over
with Stazon ink in black


To complete the hanger I painted 
the back with black paint, 

rubbed over the front with various
colours of Treasure Gold, 

splattered white paint onto the surface,

 attached the tap with a glue gun

 and completed it  with Stickles 

and a small brass clock face from my stash


Happy Crafting Everyone xx


Thank you Angela, think you probably
deserve a rest with your feet up after that
beautiful hanger 


I enjoyed this project very much
and will be looking through my stash
this afternoon to see what I need to order..........

'till tomorrow, everyone

Mickie xx