Showing posts with label Stickles. Show all posts

Wednesday, 8 November 2017

Find It


Find It


Hi There!

You may wonder what you
are being asked to find.......
Worry not Find It is the name
of a die cut company, new to
us but some of you may be
familiar with them.

We thought we'd give them a
whirl this week and here is
Jane Castle to start us off:

"Well time is marching on at a pace
 and if you have not made all of your 
Christmas cards yet here's a 
fairly quick idea that can be 
changed with a different centre piece
 so as to not get boring in the making.

To begin with I did all of the die cutting
 using a fab set from Find-It Media 
called 'Christmas Card Set'.


This set is great value for money,
cuts and embosses beautifully and
 some elements can be used all year round. 

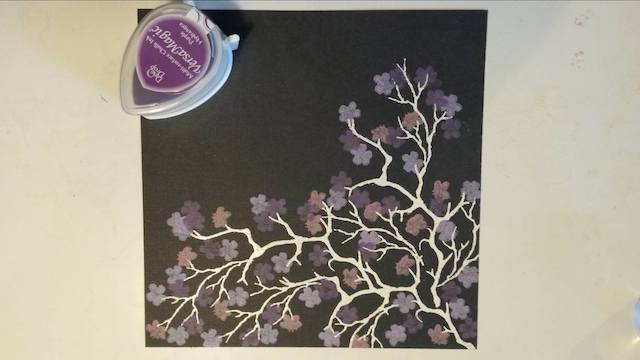
Below I've added a photo of a piece
 I cut, embossed and then stamped whilst
 the card was still in the die. 
This leaves a very fine clean edge all the way 
round rather than cutting after stamping.


Whoops, back to the job in hand!

Next I stamped the crate image from a 
Craft Emotions stamp set onto white card
 and kraft card. The kraft card was then
 cut so as to form the outside of the crate.


Both images were heat embossed with clear 
embossing powder. Colour was added using 
Distress Markers and Jelly Roll pens.

The card blank had DI in old paper added 
to the edges and then using the same ink 
stamped the zig-zag lines from Jofy 07. 
These were then brushed with Perfect Pearls.

A tag was stamped using Jofy 47 stamp set
 and this was attached to the crate with some
 ribbon before fixing to the card.


A little Treasure Gold was rubbed onto the 
die cut mounts after lightly sanding. 

The gorgeous holly die-cuts were then
 slightly shaped and curled as I prefer things 
not completely flat.


Stickles were added to the berries and 
Pewter Liquid Pearls added to the crate
 to enhance the nails.


It's a long while since I made any traditional 
red/green Christmas cards and they do have 
that magical feel to them, I wonder if it will catch on!!

Enjoy your Christmas card making X"


Items Used:


Many thanks Jane, a super
project to start us off

At the rate I'm going it doesn't
look like I shall be sending any
cards this year! Better get 
my skates on......

'Till tomorrow

Mickie xx

Wednesday, 29 March 2017

Silhouettes

Silhouettes 


Hallo there!

We're nearly a quarter of
the way through the year!

Spring is sprung and the
grass is riz................

So with faeries in mind
here is Angela Radford:


"Hi all, Angela here to show you how I've used 
these gorgeous stamps with my Gelli Plate. 

To begin with I used distress ink with a brayer 
to cover the Gelli Plate. 

I know what you're thinking, 
where is the ink but just wait and see


Place the card over the plate and smooth 
with your hands or a clean roller


 And here is what it should look like


Next cut a circle by hand or with a die and place it in position. 
Brayer over this with your next colour and place the card 
over this and smooth again to transfer the ink


You may wish to turn the Gelli print before stamping 
to get the moon in the position you prefer which I did here.

 Now it's time to stamp.


I continued stamping with coloured distress inks 
until I was satisfied with the coverage 
and then inked the edge by going over it 
with a blending tool


Now I added the Silhouette stamps. 
For these I used a black ink pad, 
first and second generation stamping for 
the flowers.


Rip a piece of paper to cover the bottom section 
to create an area for the fairy and toadstool to stand on 
otherwise they will look as though they are floating. 

Go over this area with Archival ink using a blending tool


I completed the card by stamping with silver ink 
onto a black card blank and added touches of white highlights 
and Stickles Glitter Glue to the stamped images 
before matting and layering


 I couldn't resist adding a little stamping inside. 


Hope you enjoyed watching me make this card. 
I so love Lavinia stamps and I'm sure you will too. 

Happy Crafting

Angela xXx"


Products used:


Thank you Angela for a
lovely card

I do like a bit of magic.............
speaking of which, I wonder where
the winter faeries go in springtime?

Anyone?

'Till tomorrow

Mickie xx


Saturday, 21 January 2017

Card-I-O


Card-i-o


Hallo, nice to see you

Have a card today from
Karen Gist, who's theme
is new baby

Take a look:


I have chosen to make a new baby card as a close friend 
is having a baby boy soon!


Card-I-O stamps are lovely to use in building up a picture. 
They are small and detailed and a brilliant addition to your stamp collection. 

Versamagic inks are chalky so you can get a very delicate feel to your project, though it is harder to photograph!

Firstly I made a background on white card. 
I dabbed some ink onto my craftmat and sprtized with water, 
then swiped the paper over it. 

Because of the nature of the ink you get a lovely soft marble effect.


I cut a circular aperture out of the centre of a square white card blank.
Then I set to with the stamps using the branch from the Oriental Blossom set first stamped with Aquatic Splash and Wheat. 

Then I added a few flowers using Aegean Blue and butterflies 
and leaves using Wheat.

 From the Pitter Patter set I stamped the hearts in Perfect Plumeria


From the Pitter Patter set stamp the babygro in Wheat 

and the rabbits (how cute are they?) in Aegean Blue. 

When they are dry add the teensy clothes pegs in the blue 
and Perfect Plumeria as shown. 

I also 2nd stamped the hearts onto the babygro. 

When dry cut out and glue the pegs to a piece of cord.


Make two holes either side of the aperture and tie the cord in place
 so that it looks like a clothes line. 

Attach some of the marbled card to the inside back of the card. 

Stamp a sentiment onto it so that it shows just below the babygro. 

Add some dots of stickles to add a bit of sparkle.


Supplies:


Thank you Karen - such a cute card

Be good to have a small stock
of these in different colours


'Till tomorrow - stay warm

Mickie xx


Friday, 20 January 2017

Card-I-O


Card-I-O


Hallo everyone

More stamping fun today
from Helen Chilton:

Hi there, Helen here. 

This time I've made a fairly wintry card 
using Card-i-o stamps and VersaMagic ink pads


Using a circle stencil, rub Sea Breeze directly onto card, blending as you go


Leave centre white.


Stamp branches round circle in Eggplant


while still wet, sprinkle on some Shabby White embossing powder and heat.


Stamp the pine branch in Turquoise Gem.


Then add the needle sprig in Aloe Vera,


the pine cone in Hint of Pesto,


and the same colour for the robins


Finally add flowers in Perfect Plumeria and Persimmon


Finish off with a tiny word and some Stickles glitter.


The finished card


Stamps used: Card-i-o: Tall Trees, Festive Tweets, Festive Fircones

Other materials:


Beautiful card Helen, thank you.
These stamps really do bring out
the artistic designer in us all


Think I will have to keep my Versamagic 
Ink Pads on my desk - they are so easy
to use - need to use them more..........

'Till tomorrow
Mickie xx


Wednesday, 18 January 2017

Card-I-O

Card-I-O

Hallo Everyone!

We have a new theme this week:
Card-I-O stamps 

The DT have been keen to show
what they make of these stamps - 
and it is all good..............

We start off with
Louise Thomson


One of the lovely things about versa magic ink pads 
compared with others is that they maintain their colour 
when stamped on dark card. 

I wanted to make the most of this quality for my project 
and so worked with a black base card for a bit of a change.


Start by inking up a branch stamp with clear embossing ink. 
Sprinkle with white embossing powder, 
tap off the excess and heat to set. 

I used branches from two different Card-i-o sets stamped several times, 
but one would do fine. 


Stamp the small flower from the sakura blooms set using spring pansy ink 


Stamp the side-on flower in pink petunia. 


Add more flowers using purple hydrangea. 


Finally add in some leaves using Aloe Vera. 


Now for the slightly nerve wracking bit... 
line up two nesting square dies 
and cut your image in to three squares. 


Mount each square on a piece of white card with a narrow border. 
Layer them up together and stick down with double sided tape.

Add finishing touches with a stamped butterfly 
and dots of stickles glitter in the centres of the flowers."


Materials used


Card-io Stamps: Summer wreath, Sakura blooms, Pleasant Pastures
Versamagic inks in spring pansy, pink petunia, purple hydrangea and aloe vera Nesting square dies
Stickles – diamond


Lovely project Louise.  Thank you.
Makes me think that Spring is not so
very far away......

'Till tomorrow

Mickie xx