Showing posts with label Versamark. Show all posts

Tuesday, 19 December 2017

The Christmas Table

The Christmas Table


Hi there!

Expect you've been too busy
to notice that the final item in
The Christmas Table wasn't
there on Saturday.......mea culpa
so, here it is today and well
worth waiting for I can assure
you!

So over to Louise Thomson to
show us how to finish our table:

"It's nearly Christmas!!! 
My favourite time of crafting :)

Today I'm sharing a technique that 
you can use for a Christmas table
 centrepiece, or to make lovely gifts.


I started by cutting lots of shapes from
Bazill card using Sizzix tiny tattered 
florals and winter greens dies.


On the flowers I tapped my clear
 embossing ink pad, then
 sprinkled with gold embossing 
powder and heated to give them
 a varied texture and colour.


I fixed the flowers together in groups
 of two or three using gold brads.

Next I spritzed some of the greenery 
with colour bloom shimmer spray.


To the holly I added a good coating of
 glossy accents and left them to dry 
draped over various things on my desk
 so they would have a bit of shape.


Finally I added dots of liquid pearl
 to the branches with berries.


With all the greenery prepared and set aside,
 I cut further die cuts from a gorgeous
 Impression Obsession die. 
laid  the die cut over a large church candle 
and wrapped this in a piece of 
greaseproof paper.


I needed three hands to photograph the
 next bit, so you'll have to take my word for it! 
I used my heart gun to gently heat the surface
 of the candle (through the greaseproof) until 
I started to see the colour on the die cut 
change. It does a similar thing to embossing
 powder, you'll see a corner start to change
 and darken then it sort of spreads across
 the whole image.
 Once the whole image was a solid colour 
again it was done. 


I learnt the hard way... 
DON'T TAKE THE GREASEPROOF 
PAPER OFF YET! 
count to ten slowly giving the wax
 time to set a little, then remove it.
 You should find the die cut has
 embedded itself beautifully on to
 the candle.

I repeated this in the other side
 of the candle too.

I ran a couple of strips of double sided 
tape along the bottom of the candle 
and started to adhere the greenery.


With all the greens stuck down, 
I added the flowers back in.


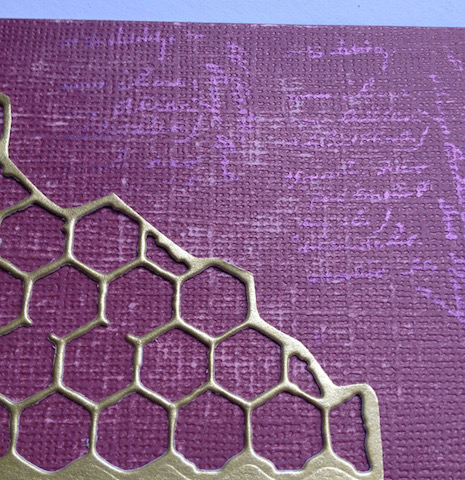
Here's a close up of the
base of the candle:"


Materials:


Thank you Louise, this would
look lovely on anyone's table


Our Christmas Table is now
complete - leave you to cook
the turkey/goose/nut roast
or whatever else is the tradition
in your house - but don't
forget the sprouts!  


'Till tomorrow

Mickie xx


Wednesday, 30 November 2016

Red & Gold

Red & Gold


Hi there!

It's the last day of November
Such a quick month 

Our theme this week is Red and Gold
and Jane Castle is here today 
with a beautiful card:


I started this card with a piece of 300gsm white card which was coloured with Fresco Chalk paints in Plum, Very Berry and Claret. Once these were completely dry I added some Distress Inks in Aged Mahogany and Fired Brick with a blending tool.


Next I stamped the leaves from PaperArtsy EDY12 
and the trellis from Jofy 12 in Fired Brick and whilst wet 
lightly brushed over some Cosmic Shimmer Mica Powder in Antique Red.

Once trimmed to size the centre was then die cut 
with a Spellbinders die and embossed.

The top was stamped with ‘How Does Your Garden Grow’ 
from ELB03 and heat embossed using gold embossing powder.

The bottom section was then stamped with the flowers from Jofy 12
 in versaMark ink and heat embossed using clear embossing powder.


Next I made the centre piece for the aperture, 
for this I used some Core’dinations sand it, tear it in dark burgundy
 and lightly sanded before stamping with a text stamp 
in Brilliance Crimson Copper ink and also 
brushing with the mica powder.

The honeycomb was cut from gold card 
using a Tim Holtz Thinlits die.


The lace was coloured with Distress Stain in Antique Bronze 
and attached to the back of the aperture with double sided tape, 
adding the pleats in as it was secured.


The flower came from a Tando Grab Bag


This was coloured with the Antique Bronze Distress Stain 
and the texture on the petals came from liberally applying
 Distress Stain through the sponge top.

The centre was decorated by applying Grunge Paste 
through the stencil, then when dry 
adding some Treasure Gold in Ruby.

The edges of the petals were hi-lighted with Aged Mahogany ink

The swirl was cut from some darker gold card 
using a Crafty Individuals die.
This was then cut into 2 and stuck behind
 the aperture to secure


The dragonfly brad was coloured with Renaissance Treasure Gold.

Materials Used


A lovely card with lots of texture
and techniques

Thank you Jane


Well I'm off to make some cards
see you all again tomorrow

Mickie xx


Thursday, 3 November 2016

Advent Calendar


Advent Calendar

Hallo everyone!

Hope you are all well, warm and the

Festive makes are going to plan!

Today we have Angela: who is 

going to show us how she made her

Advent Calendar 


I decided to make some matchbooks for this project 

and display them in a box. 


So I started by stamping on three A3 sheets 

of Kraft style card using Woodware Christmas stamps

I used clear embossing ink and then 

heat embossed with white powder. 


Next I sprayed these with Dylusions White Linen ink

to give the effect of snow


I used a Tim Holtz die to cut the matchbooks

but they could easily be drawn with a ruler and pencil, 

then cut using a paper trimmer

just measure them to fit the card as shown here


 Once all the books are ready they need to be folded

 and the top flaps stapled in place. 

You will probably need score board at this stage


Next the box. 

I made it so that the matchbooks would fit snugly inside. 

You could make this by any method you prefer. 

I used a score board to make mine

Initially I had not sprayed this with the white ink 

but did that stage when the box was constructed


I decorated the box with ribbon and a Noel text

 which I sprayed with some glitter varnish.    

The numbers where die cut,

 again both dies were from the Tim Holtz range.


Finally I added small pegs to the top of the Matchbooks

 as they seemed to sit better in the boxwith those on

I plan to put some Christmas jokes in the books 

but you could put other things in too.

Although you can’t see it very well I have also added 

some red stickles glitter glue to the robins. 

If you don’t like the idea of having them in a box 

they could also be attached to ribbon or string and hung up


Materials used:


Thank you Angela.

I rather like the idea of a merry quip 

within each one to start the day

with a grin - those jokes out

of last year's Christmas Crackers would

be ideal.  You don't save those?

Just me then! 


Mickie xx