Showing posts with label Frantage. Show all posts

Friday, 20 January 2017

Card-I-O


Card-I-O


Hallo everyone

More stamping fun today
from Helen Chilton:

Hi there, Helen here. 

This time I've made a fairly wintry card 
using Card-i-o stamps and VersaMagic ink pads


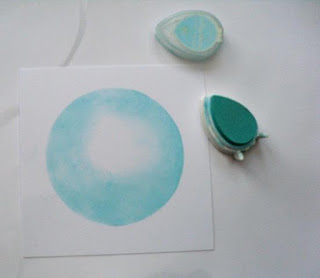
Using a circle stencil, rub Sea Breeze directly onto card, blending as you go


Leave centre white.


Stamp branches round circle in Eggplant


while still wet, sprinkle on some Shabby White embossing powder and heat.


Stamp the pine branch in Turquoise Gem.


Then add the needle sprig in Aloe Vera,


the pine cone in Hint of Pesto,


and the same colour for the robins


Finally add flowers in Perfect Plumeria and Persimmon


Finish off with a tiny word and some Stickles glitter.


The finished card


Stamps used: Card-i-o: Tall Trees, Festive Tweets, Festive Fircones

Other materials:


Beautiful card Helen, thank you.
These stamps really do bring out
the artistic designer in us all


Think I will have to keep my Versamagic 
Ink Pads on my desk - they are so easy
to use - need to use them more..........

'Till tomorrow
Mickie xx


Saturday, 24 December 2016

Merry Christmas


Merry Christmas


It's the night before Christmas
and all through the house..........

I've always loved that rhyme!
I used to like 5pm on Christmas Eve
too.  That was when all the shops
would be shut and "what was forgot
was done without"!  

Nowadays, there's always a shop 
open somewhere.................

Reminiscing over, we have a
beautiful card from Helen Chilton
today and here she is:


Here's a card to wish you all a Happy Christmas!


Here's how I made it:

Mask off the snowy layer at the bottom and sponge some
 VersaMagic Sunflower Yellow and Mango Madness onto the sky


Using Direct to Paper method, rub on some Sea Breeze 
and then add Night Sky round the edge


With the snow mask still on, stamp some branches in the distance 
using Whey and Aspen Mist.


Start to stamp the birch trees in Eggplant, 
quickly adding Stampendous Frantage Shabby White 
embossing enamel while wet


Remove snow mask and stamp the foreground trees


Rub some Eggplant lightly onto the snow to give it dimension


Stamp the greeting from the JOFY set in Eggplant -
curve it to fit round slope.


Finish by adding foliage, pine cones and robins.


Here's a close up of my double sided card.


Stamps used:

Card-i-o: Tall Trees, Festive Tweets, Festive Fir Cones
PaperArtsy JOFY 06

Other Materials:

VersaMagic inkpads: Sunflower Yellow, Mango Madness, Eggplant, 
Aspen Mist, Sea Breeze, Night Sky, Whey

Stampendous Frantage embossing enamel: Shabby White


Truly a card for someone special Helen
thank you very much and on behalf
of all of us
Merry Christmas to you

Mickie xx


Thursday, 27 October 2016

Mixed Media


Mixed Media

Hallo everyone! 
We're almost through the month already
Can you believe it?
Me neither, although I seem to be wearing a
jacket more often now when I leave the house!

Here is   Angela Radford

who has given us this beautiful project


The plan for this project was to create a canvas with lots of dimension.

 I started by tearing two pages from an old book then coloured these with sprays. 

While these were drying I started on the canvas by adding Gesso and Crackle Paste through stencils. Once this was fully dry I coloured it using sprays, drying between each colour.


Tear down the centre of one of the book pages and remove a third from each. Edge the sheets with distress ink. Roll these around a thin paint brush and glue.


Continue to add colour to the canvas using sprays and distress inks and 
then when dry use a text stamp randomly over the canvas.


4. Use a brayer with white Gesso to highlight the raised areas and edge it with distress ink.


Die cut a range of cogs and colour these with sprays and distress inks then stamp over them randomly. I used a Tim Holtz stamp but any text stamp would be good.


Next I made a Masterboard using the same stencils, medium, sprays and inks.


Using the Masterboard, die cut three tags, distress, stamp and colour the edges. I screwed these up a little as this gives more interest and dimension when mounted.


I used an MDF frame and lightbulb from my stash to create the focal image and decorated these with Stampendous Frantage in a variety of colours. You can see here that I splattered the canvas with white paint too.


And here is the finished canvas. Hope you like it.


Happy crafting, Angela x

Materials:
Thank you for a lovely project Angela

The Color Bloom Sprays are, in my opinion, such good value 
when the bottle is empty just fill it up again with water and
you are ready to go again with that luscious colour!
You can do this twice - see the table for instructions
and the colour range is..............awesome!

See you all again tomorrow

Mickie xx