Showing posts with label Lavinia stamps. Show all posts

Sunday, 7 January 2018

At Random


At Random


Hallo Everyone!

Hope you are having a lazy
Sunday................why not
spend a little time with
Louise Thomson as she plays
with Dylusions and fairies......

"I could play with Dylusions sprays all day! 
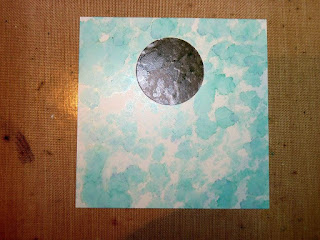
Here are a few backgrounds created by 
spraying either directly on to card then
 adding extra water, or by spraying on to my 
non stick mat and then picking up the colour
 -or both! 


I chose one of my backgrounds to 
create a simple card. 

It is stamped with Lavinia stamps 
using Memento ink, touched up 
with Wink of Stella for some sparkle
and mounted on to black card to finish."


Thank you Louise such a lovely card
and so simple to make too.  


I think the design would look 
well embossed in white on the 
darker background too.......


Have you noticed?  All three cards
that have been featured this week
would lend themselves to almost
any occasion from Get Well to
Happy Birthday to sending a note.

So just pop onto the SALE and
choose your background medium
to get you started.............

There's lots of papers too that you
can stamp directly onto for that
all important background........

'Till tomorrow

Mickie xx


Wednesday, 3 May 2017

Archiving

Archiving


Hallo Everyone!

Hope you've all recovered
from your Bank Holiday
excesses!  

Here we have had the annual
Jack in the Green Festival
(Some of you may know him
as The Green Man) but in 
these here parts...............

Street entertainers galore,
a bit of a fun fair and parades.
Definitely one of those Oh to
be in England moments......

Sorry to drivel on if you are
elsewhere in the world......
You could get your own back
and tell us what is happening
where you are................!

In the meantime, we have
Jane Castle to share her new
Scrapbook with us.....:


"I made myself 2 promises this year, 
the first was to start an art journal 
( which I've done) the second was 
to make a start on sorting out my 
Mum's old photos and to make a 
scrap book for my daughter's family.

As Mum is heading for her 98th birthday
I felt I'd better get a move on while she 
can still identify some of the Great Aunts
 and Uncles etc.


The page I'm sharing with you today 
has a photo of my Mum, Nan and Aunt. 

For this I've used some of Kaisercraft's
beautiful 12 x 12 papers.

To begin with I trimmed my base paper 
to 27cm x 27cm----- I decided that I might
 need to move some pages as 
more photos are found so thought
 that if they all measured the same and 
were placed in the scrap book with photo 
corners moving them wouldn't be a problem.

The 2 pieces that were trimmed off 
would be used on the page but turned over. 

Next I cut the frame for the photo using 
another piece from the same collection and 
a Spellbinders Die.


Measuring on the back of the frame I marked 
where the slits were needed  for slotting in 
the corners of the photo. 

I then stamped in Archival Ink some random 
bits of text using a PaperArtsy Mini stamp, and 
some flowers using a Lavinia stamp. 

For both sets of stamping I used 
second generation ink.

The flowers were then brushed 
with Ranger's Perfect Pearls.


I then cut various flowers and leaves ready 
to decorate the page.


For this I used some Core-dinations sanded it, 
tore it and the trimmings from the 2 sheets of 
Kaisercraft Mademoiselle Collection


Then it was down to attaching everything 
to the page. 

The 2 strips that had been reversed after
 trimming were stuck with double sided tape, 

the 2 hollyhock flowers were tied with 
some string and stuck with Cosmic Shimmers glue.

The centre piece of pink Core-dinations was 
lightly sanded before attaching. 

For the journaling I used a 
Tim Holtz Idea-ology journaling ticket 
and wrote on it with  a matching brown ink. 
(I had a blue ink in my fountain pen 
and it looked so out of place!!)


A few pearl embellishments for the flower centres
 and the page is complete. 

I really enjoyed putting this page together 
but when you've got beautiful paper/card
and some wonderful photos 
how could you not have fun?!"

Items Used

Kaisercraft Madewmoiselle Collection - Timepiece and Posy
Core-dinations sand it, tear it emboss it - 
Thinlits Tim Holtz mini Tattered Florals 
Memory Box dies - Hollyhock Stem and Ivy tendrils
Archival Ink - Sepia and Watering Can
Tim Holtz Idea-ology Journaling Tickets
Lavinia - Wild Flower stamp
PaperArtsy Mini Ink and the Dog stamp


Thank you for sharing Jane.  
So good to still have your mum
with you to explain who's who
in the old photos. 

I wonder how scrapbooking will
evolve now that we seem to
have lots of photos.............

.........stored in our digital devices
but nothing printed

Leave you with that

'Till tomorrow

Mickie xx


Saturday, 1 April 2017

Silhouettes


Silhouettes


Hi there!

Today we have a great card that
could be either masculine or 
feminine.  Hmm.... any fantasy
fan too!

Louise Thomson is here to
take us through it


"Lavinia make some absolutely stunning stamps, 
perfect for creating scenes and silhouettes.


I had a go at using mine to create a fun fantasy scene.

I cut a circle from thin scrap card using a punch 
and stuck it in place using a low tack adhesive.


Next I blended a selection of firey coloured distress inks 
over the top to create a backdrop for the scene. 

I started with the paler yellows and built up the colour 
more around the edges for depth.


Next I removed the circle mask.
I decided I wasn’t happy with the starkness 
of the white below so I blended a very small amount
 of antique linen distress ink on to the moon. 

I tore the edge of a piece of scrap paper and 
cut a volcano shape from it. 

I stuck this down with low tack adhesive and blended
 fired brick and hickory smoke distress inks over the top.

I continued to use torn paper masks 
to build up the layers in the scenery.


Once I was happy with the background, 
I started to add in my silhouette stamps.


The castle stamp has been stamped 
multiple times overlapping itself so that it 
looked the right size for the scene. 


I also added fineliner shadowing beneath it.
Finally I matted the scene on to a bit of 
shimmery black paper from my stash and 
mounted on to a blank card."


Materials used
Lavinia stamps: 
Distress inks; Antique linen, Scattered straw, 
Carved pumpkin, Fired brick, Hickory smoke, 
Seedless preserves, Candied apple.
Card blank (6”x6”)

Thank you Louise for setting the imagination alight
with this super card.


My brain has whirled into the realms of
fantasy - I'm thinking Game of Thrones, 
Lord of the Rings, Hobbits

Who thought Lavinia Stamps were just
for cutesy fairyland projects.........?


'Till tomorrow

Mickie xx


Friday, 31 March 2017

Silhouettes

Silhouettes


Hallo there!

Another lovely day
and I hope, a happy one

Certainly Claire Jackson is
set to make us smile with her
beautiful project, so let's get
going........


"Cut a piece of yupo 10cm x 10cm. 
Use a piece of masking paper or a post it
to create a mask for the moon. 

Using a felt applicator dab spots of aqua alcohol ink 
over the entire piece of paper. 

On a clean piece of felt pad put a few drops 
of blending solution and go over the aqua 
to create a mottled background.


Tear a piece of card to mask off the upper part 
of the square and create a hill line. 

Apply turquoise ink below the mask. 
Go over with blending solution. 

Move the mask down and add purple twilight 
around the bottom. 

Remove the moon mask and add a mixture of 
turquoise and purple alcohol ink around the 
edges of the square. 

Make sure a few dots overlap the moon
 to create the impression of depth.


 Stamp the rabbits in black Archival ink. 
(Touch up any pale bits with a black Sharpie.)

 Along the bottom, stamp the fairy buttercups
 in cobalt and deep purple. 

Stamp the mini leaves around the sides 
and top in cornflower blue and cobalt. 

Add a couple of drops of aqua ink to a baby wipe 
and gently dab onto the moon to create depth.


Add black stems with a fine permanent pen 
and white highlights with a gel pen. 

Add a very pale grey edge to the moon 
with an alcohol marker.


Stick the top layers of the printer tray together 
and paint the tray and stand in Fresco Finish eggplant. 

When dry, stamp the tray (not the stand) 
with small flowers in mermaid and sherbet. 

Wait for it to be completely dry and paint 
a thin layer of translucent blueberry over the top. 
The flowers will just show through. 
If it’s too thick just wipe it back with a baby wipe.


Rub on a thin layer of pink tulip Alchemy Wax, 
again using a baby wipe to take off any excess. 

It’s hard to see in the photos but it adds a delicate shimmer.


Run a clear embossing pad along the edges
 and emboss in silver embossing powder. 

Cut a piece of patterned paper to go on the back of the tray. 


Assemble all of the pieces together"

Materials used:


Alcohol ink: purple twilight, turquoise, aqua
Archival ink: jet black, cobalt, cornflower blue, deep purple
Alchemy wax: pink tulip


Thank you Claire for such a fun project
Another for my 'To Do' list.......


'Till tomorrow

Mickie xx

Thursday, 30 March 2017

Silhouettes

Silhouettes 


Hallo there!

Hope you have a happy day

Jane Castle has dropped by today
with a beautiful cheery project
that's sure to bring a smile or two

"I am a big fan of Lavinia Stamps so was very delighted 
when this topic came up. 

The card I'm sharing with you today 
is fairly simple to produce but has 
a girlie magic about it.


To begin with I stamped Believe onto a piece of shrink Plastic 
in Brilliance Pearlescent Olive and Starlite Black. 

This was then cut to size and 2 holes punched 
at the top before heating to shrink.


This was then threaded with some bakers twine 
and set aside whilst I continued with the card. 

For this I started with a blank DL sized card 
and coloured the background with Distress Inks
 and a blending tool.


Then using a small sponge and a torn piece of paper 
added cloud/mist hi-lights before stamping the bottom 
and sides with the flower border stamp and Starlite Black ink. 

Whilst the ink was still wet I brushed on some 
mica powder to give the fairy dust feel.


The fairies were then stamped in black and as there are 
just 3 dancing fairies on this stamp I positioned the second set 
of 3 so the ribbon at the top entwined to give the appearance 
of it just being one continous stamped image.

I then added detail to the ribbon with a fine black pen and tiny dots. 

Lastly I stamped 2 clusters of stars each side of the Believe banner 
and brushed them with perfect pearls.


The nice thing about cards like this is they are suitable 
or any age group young or more mature!"


Items Used

Shrink Plastic
Distress Inks in Faded Jeans, Wild Honey, Victorian Velvet, Twisted Citron and Pumice Stone
Brilliance ink in Pearlescent Olive and Starlite Black


A delightful card Jane, very many thanks.


This would be a good one to
have as a standby I feel so guess
what I'm going to do this afternoon?!

'Till tomorrow

Mickie xx