Showing posts with label Distress Inks. Show all posts

Saturday, 9 December 2017

Christmas Animals


Christmas Animals


Hallo There!

.......and we've reached the
end of another busy week!
Time for you to put your 
feet up and relax with a cup
of something warm and
cheery before you have to
hit the treadmill once more
...................!

Here's Jane Castle with the
final Christmas Animal for
this week...:

"Hi Everyone, for my Christmas Animal 
I chose the Stag, such an elegant creature 
and one that has become more readily
 visible in our neck of the woods during 
the past 10 years.

To begin with I coloured some of the
 Creative Expressions Pop-ems deer using
 ink straight from the coffee bean ink pad.


These were then put to one side while I
 created a scene on my card blank.

The sentiment was stamped at the bottom
 righthand corner and the sky was coloured
 with DI and a blending tool.


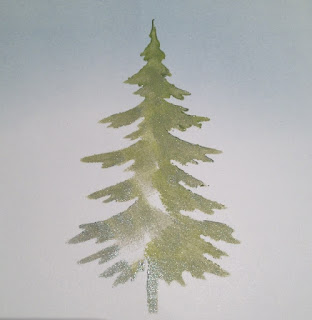
Next I placed 2 blobs of paint on my craft mat
 and gradually blended graduating colours to 
be sponged through my 
Tim Holtz Woodland Layering Stencil.


Adding slightly different shades as I went.


I love how the Zinc paint gives that
 subtle shimmer. 

Gradually the scene starts to build.


With christmas cards I like to make 
several in one sitting.

Then using the same sponge and paints 
I added some snowey hills to ground my trees


Using a Quickie Glue pen I added some 
glitter to the trees and the ground. 
Stickles could also be used for this.


All thats left is to add my Stag.


Although the coffee bean ink pad isn't a 
pearlescent one it still has a slight sparkle
 and texture.


Really liked using the Pop-ems,
 good selection of sizes and different poses. 

Plus once the deers have been used
 you are left with a pretty comprehensive 
stencil ------ bonus!!!"

Materials Used

Creative Expressions Pop-ems
Quickie Glue pen
Glitter


Super cards Jane
Thank you very much
You look to have had a
lot of fun making these


So, that was the week of
Christmas Animals.

Such fun showcasing another
side of Christmas icons

'Till tomorrow 

Mickie xx


Saturday, 18 November 2017

Crafty Emotions


Crafty Emotions


Hi!

Have you got all your weekend
chores done? Good for you!

Now it is time to sit back and
relax and what better place to
start than with Jane Castle's
Thank You card........


"At this time of year it's so easy to concentrate
 solely on Christmas but it's probably a good
 idea to have a couple of cards ready made
 and 'In the Bank' as to speak for those 
special thank-you's. 

Not only for a fabulous gift but dinner parties, 
drinks gatherings with neighbours 
and then there's 'New Year' parties. 

Today I'd like to share with you a card that
 can easily be adapted using different colours
 if it's for a male or depending on what
 you might have in your 'crafting stash'.


I started by preparing my outer frame, for this I painted 
a piece of smooth white card with Mud Splat paint. 
Once dry it was then given a coat of Weathered Wood, 
left to dry again and then a final coat of Blush
 

This was then put to one side as I wasn't sure 
at this stage how large I would need
 to make my aperture.

Using the following stamp set and inks I proceeded
 to build up the layers of my wild flowers.


The first to be stamped was the cow parsley, 
this was heat embossed with white EP.


Then I gradually filled in the bunch using 2 other 
stamps from the same set. 

Finally I added a few hand drawn stems using a
 Distress Marker. 

After trimming to size I punched 2 holes, 
1 each side of the stems, threaded some
ribbon through and tied a bow.


After cutting my frame to size I then decided to
 add some narrow lace to the inside of the aperture. 
This was attached using narrow double sided tape.

A die cut tag was then stamped with my sentiment 
and this was attached using a dragonfly brad.


Using a different sentiment on the tag this could be 
adapted for many different occassions, so one could 
make a couple of cards and add the tag when needed!"

Items Used

Lace from sewing stash

What a lovely card Jane;
thank you.

Just goes to show you don't need
a load of stamps and supplies
to make a stunning card

'Till tomorrow

Mickie xx


Wednesday, 8 November 2017

Find It


Find It


Hi There!

You may wonder what you
are being asked to find.......
Worry not Find It is the name
of a die cut company, new to
us but some of you may be
familiar with them.

We thought we'd give them a
whirl this week and here is
Jane Castle to start us off:

"Well time is marching on at a pace
 and if you have not made all of your 
Christmas cards yet here's a 
fairly quick idea that can be 
changed with a different centre piece
 so as to not get boring in the making.

To begin with I did all of the die cutting
 using a fab set from Find-It Media 
called 'Christmas Card Set'.


This set is great value for money,
cuts and embosses beautifully and
 some elements can be used all year round. 

Below I've added a photo of a piece
 I cut, embossed and then stamped whilst
 the card was still in the die. 
This leaves a very fine clean edge all the way 
round rather than cutting after stamping.


Whoops, back to the job in hand!

Next I stamped the crate image from a 
Craft Emotions stamp set onto white card
 and kraft card. The kraft card was then
 cut so as to form the outside of the crate.


Both images were heat embossed with clear 
embossing powder. Colour was added using 
Distress Markers and Jelly Roll pens.

The card blank had DI in old paper added 
to the edges and then using the same ink 
stamped the zig-zag lines from Jofy 07. 
These were then brushed with Perfect Pearls.

A tag was stamped using Jofy 47 stamp set
 and this was attached to the crate with some
 ribbon before fixing to the card.


A little Treasure Gold was rubbed onto the 
die cut mounts after lightly sanding. 

The gorgeous holly die-cuts were then
 slightly shaped and curled as I prefer things 
not completely flat.


Stickles were added to the berries and 
Pewter Liquid Pearls added to the crate
 to enhance the nails.


It's a long while since I made any traditional 
red/green Christmas cards and they do have 
that magical feel to them, I wonder if it will catch on!!

Enjoy your Christmas card making X"


Items Used:


Many thanks Jane, a super
project to start us off

At the rate I'm going it doesn't
look like I shall be sending any
cards this year! Better get 
my skates on......

'Till tomorrow

Mickie xx

Thursday, 14 September 2017

Joseph's Coat


Joseph's Coat


Hi Everyone!

Thanks for dropping by.  We
continue our colourful theme
this week with Hazel Harler
who has given the ancient
technique a modern spin:


"Hi everyone, for my latest project I've used 
the Sgraffito technique. 
This one was done on mountboard.


This one was done on canvas board


 I started with a canvas board and a 
Crafters workshop mask.


I scribbled oil pastels over the canvas.


Then the canvas was covered with black gesso


I taped the mask over the canvas, 
this will stop the mask from moving.


Using something sharp gently scrape 
away the black gesso.


The finished canvas: 


Because the canvas surface isn't smooth 
a lot of black spots were left so I've decided to 
do another one on mountboard.

I made a frame out of foam board. 
I marked the board with pencil and 
cut out the centre.


 To make a backing for the frame I used 
distress ink directly onto some white card.


I painted the frame with black gesso
 and glued it to the backing.


 I decided to do another piece but on 
mountboard this time. 

I coloured the board with oil pastels 
and painted it with black gesso.


Then I taped over a mask and scraped 
the gesso away in places.


The finished board glued to the frame. 

I decided that it looked a bit plain so I 
stamped some Tracey Scott flowers onto white card, 
coloured them with Distress Oxides, cut them out and
 glued them to the board. 

I added some metal charms to the
 centre of the flowers.


I prefered using the mountboard, 
it was a lot easier to scrape the gesso away
 and it didn't leave lots of black spots."

Supplies:


More highly colourful loveliness!
Thank you Hazel  It was very
interesting to see the difference
in the two applications. Personally
I like them both!!

In these days of Mindfulness Colouring
I think this technique fits very well as
it cannot be rushed and concentrates
the mind as you do it..........

'Till tomorrow 

Mickie xx

Wednesday, 13 September 2017

Joseph's Coat

Joseph's Coat


Hi There!

Thought it might be fun to
re-visit an old technique ....
...... very old.......I remember
doing this in Primary School!

Here's Helen Chilton to start
us off..............


"Rub the Distress inks onto a panel of glossy card.


Stencil the mosaic pattern over the top 
with VersaMark...


... and then emboss in clear


Rub over a dark coloured inkpad - 
I used Black Soot.


Buff over with a cloth to remove ink 
from embossing.


 I don't think I let the ink 'cure' for long enough 
as it came out quite pale so I ....


....then rubbed over with Chipped Sapphire 
and left it for a bit longer.


Rub some Picked Raspberry and Carved Pumpkin 
onto a small piece of glossy.


Lay over and clear emboss the fish fossil


Rub over blue and black until black and blue(!) 
and then buff up.


I then added some definition with a black pen
 as it was annoying me!

Add more black pen to the background and
 layer up on card. I added some messy ribbon 
and fibres - I like a bit of a mess!"


Materials used:


Lovely bright start to the week
Helen, thank you very much.


Just when you think you have all
the layering stencils you will ever
need; somebody uses one you haven't
got!   Always the way

'Till tomorrow

Mickie xx